


Consider this Skillet Blackened Corn recipe your next favorite summer side dish! It's easy to make, incredibly flavorful, and pairs well with summer main dishes like burgers, grilled chicken or steak, and sliders. Best of all, it's ready in a few simple steps and won't heat up the kitchen!
I wouldn't be a midwest girl if I didn't have a new corn recipe for you this summer. So, I am so excited and proud to share this cast-iron-blackened corn on the cob with you!
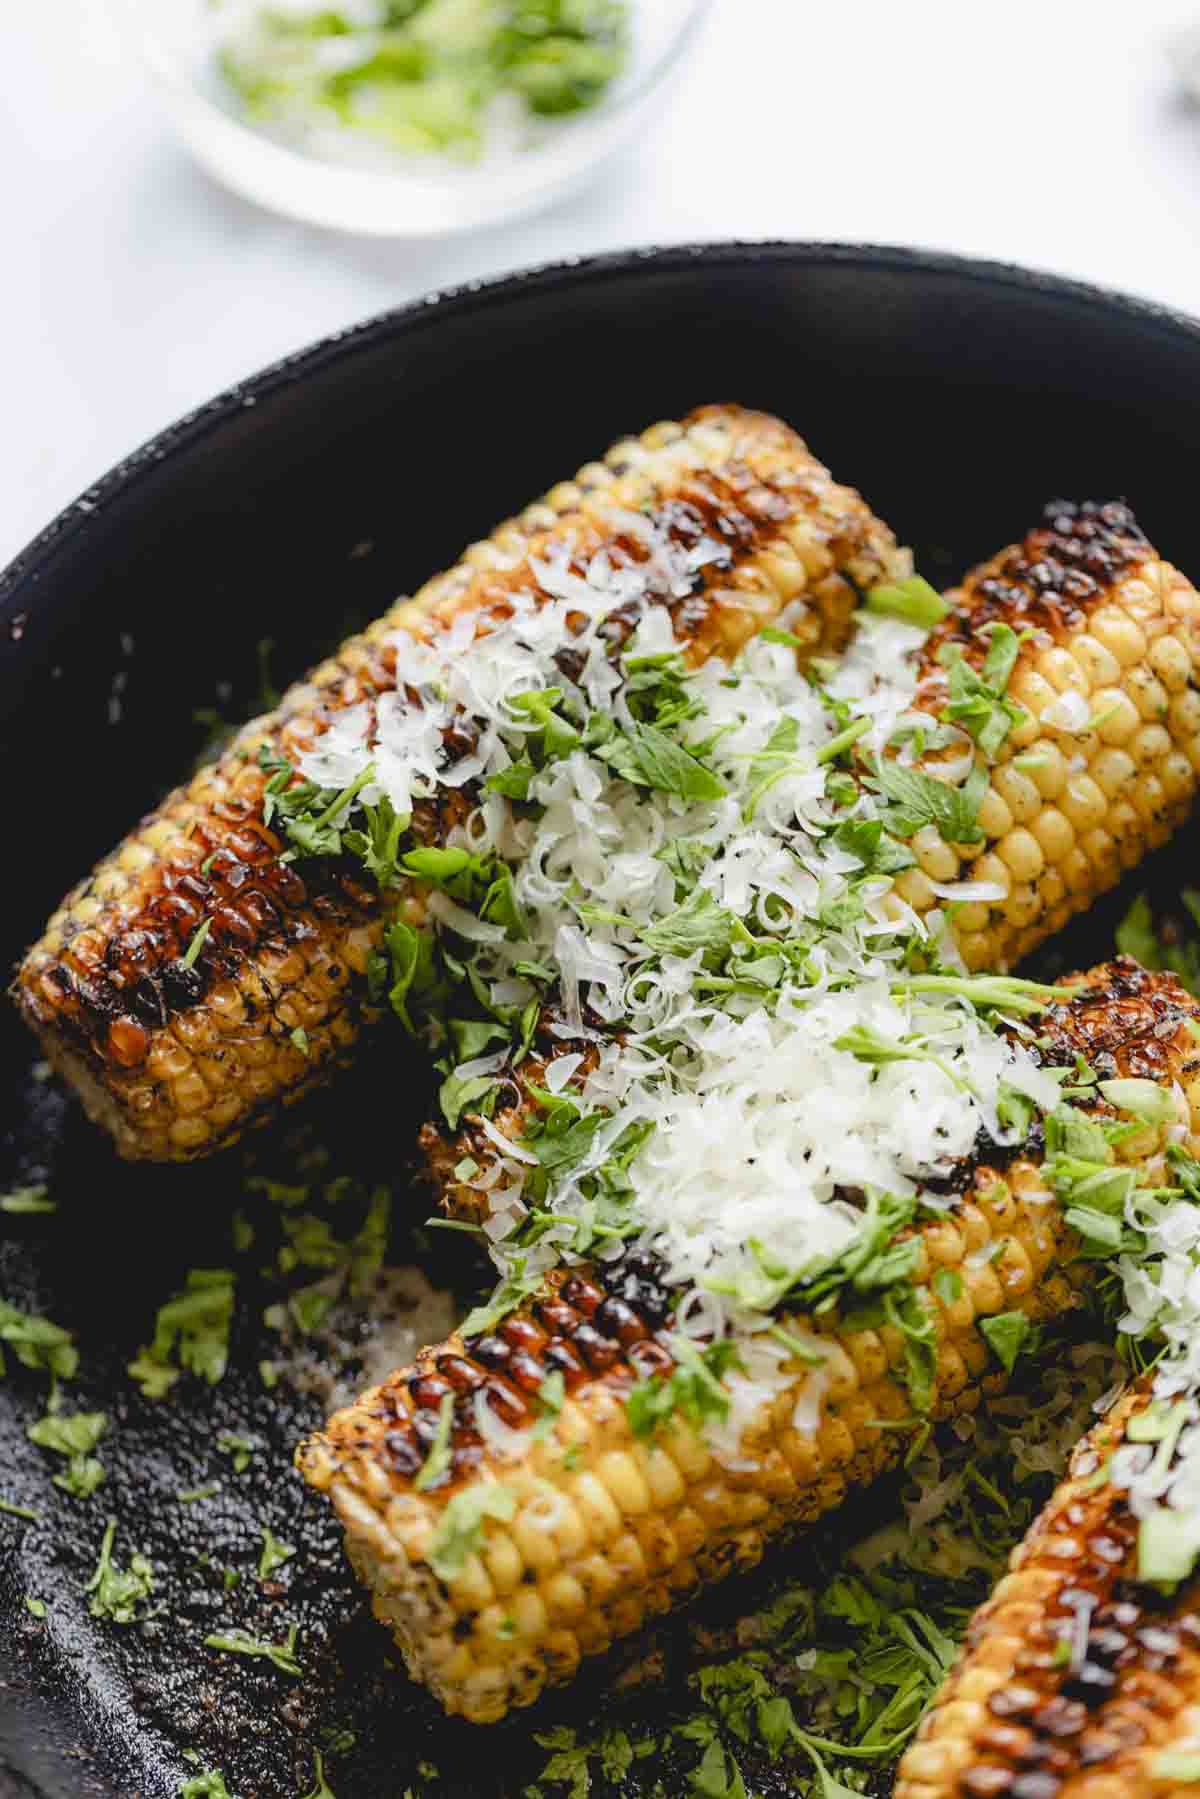
Seasoned with a buttery Cajun-inspired spice blend of paprika, oregano, garlic and onion powder, and brown sugar, the corn is charred in the skillet, creating tender, sweet, and flavorful charred corn on the cob.
One of the many reasons I love corn is its super quick prep, and this cast iron corn recipe is no exception! In just 20 minutes and a few simple steps, you'll have caramelized and savory corn. It's fantastic for weeknight meals and weekend and holiday barbecues with friends, leaving you more time to get out of the kitchen and enjoy your summer to the fullest!
For more easy and tasty summer side dish recipes, check out my Dill Pickle Pasta Salad, Spicy Watermelon Mojito Salad, Mango Avocado Salad, and Peach Prosciutto Salad with Mozzarella.
Jump to:
Why You'll Love It
- Simply Summer: What side dish is more quintessentially summer than corn on the cob? It's a must-have on long, late summer days.
- Easy and Quick: Seasoned with pantry staples and ready in a few quick and beginner-friendly steps, this charred corn is ready in less than 20 minutes!
- Family-Friendly: My whole crew always devours this corn! If you have little ones who are sensitive to spice, just reduce the rub on their portion. You can also cut off their kernels with a sharp knife for easier consumption.
🥂Make it A Rosy Moment
Whether you’re serving it at a backyard barbecue or building a casual weeknight dinner, here are three ways to make it a rosy little moment…
- Taco Tuesday Upgrade - Spoon your blackened corn over tacos for an easy flavor upgrade. Try it with Spicy Margarita grilled chicken, shrimp, or even plant-based fillings. Top with queso fresco, chopped cilantro, and a squeeze of lime.
- Street Corn Board – Hosting friends? Serve your corn as part of an “elote-inspired” snack board. Think crumbled cotija, spicy crema, lime wedges, and tortilla chips on the side so guests can DIY their own flavor combos.
- Easy Summer Lunch Bowl – Make it the star of a nourish bowl with grilled protein, avocado slices, cherry tomatoes, and a scoop of cilantro-lime rice. It’s simple, bright, and so satisfying—perfect for slow summer lunches on the patio. (Don't forget a drizzle of my Smoked Queso Dip to tie it all together!)
Important Ingredients
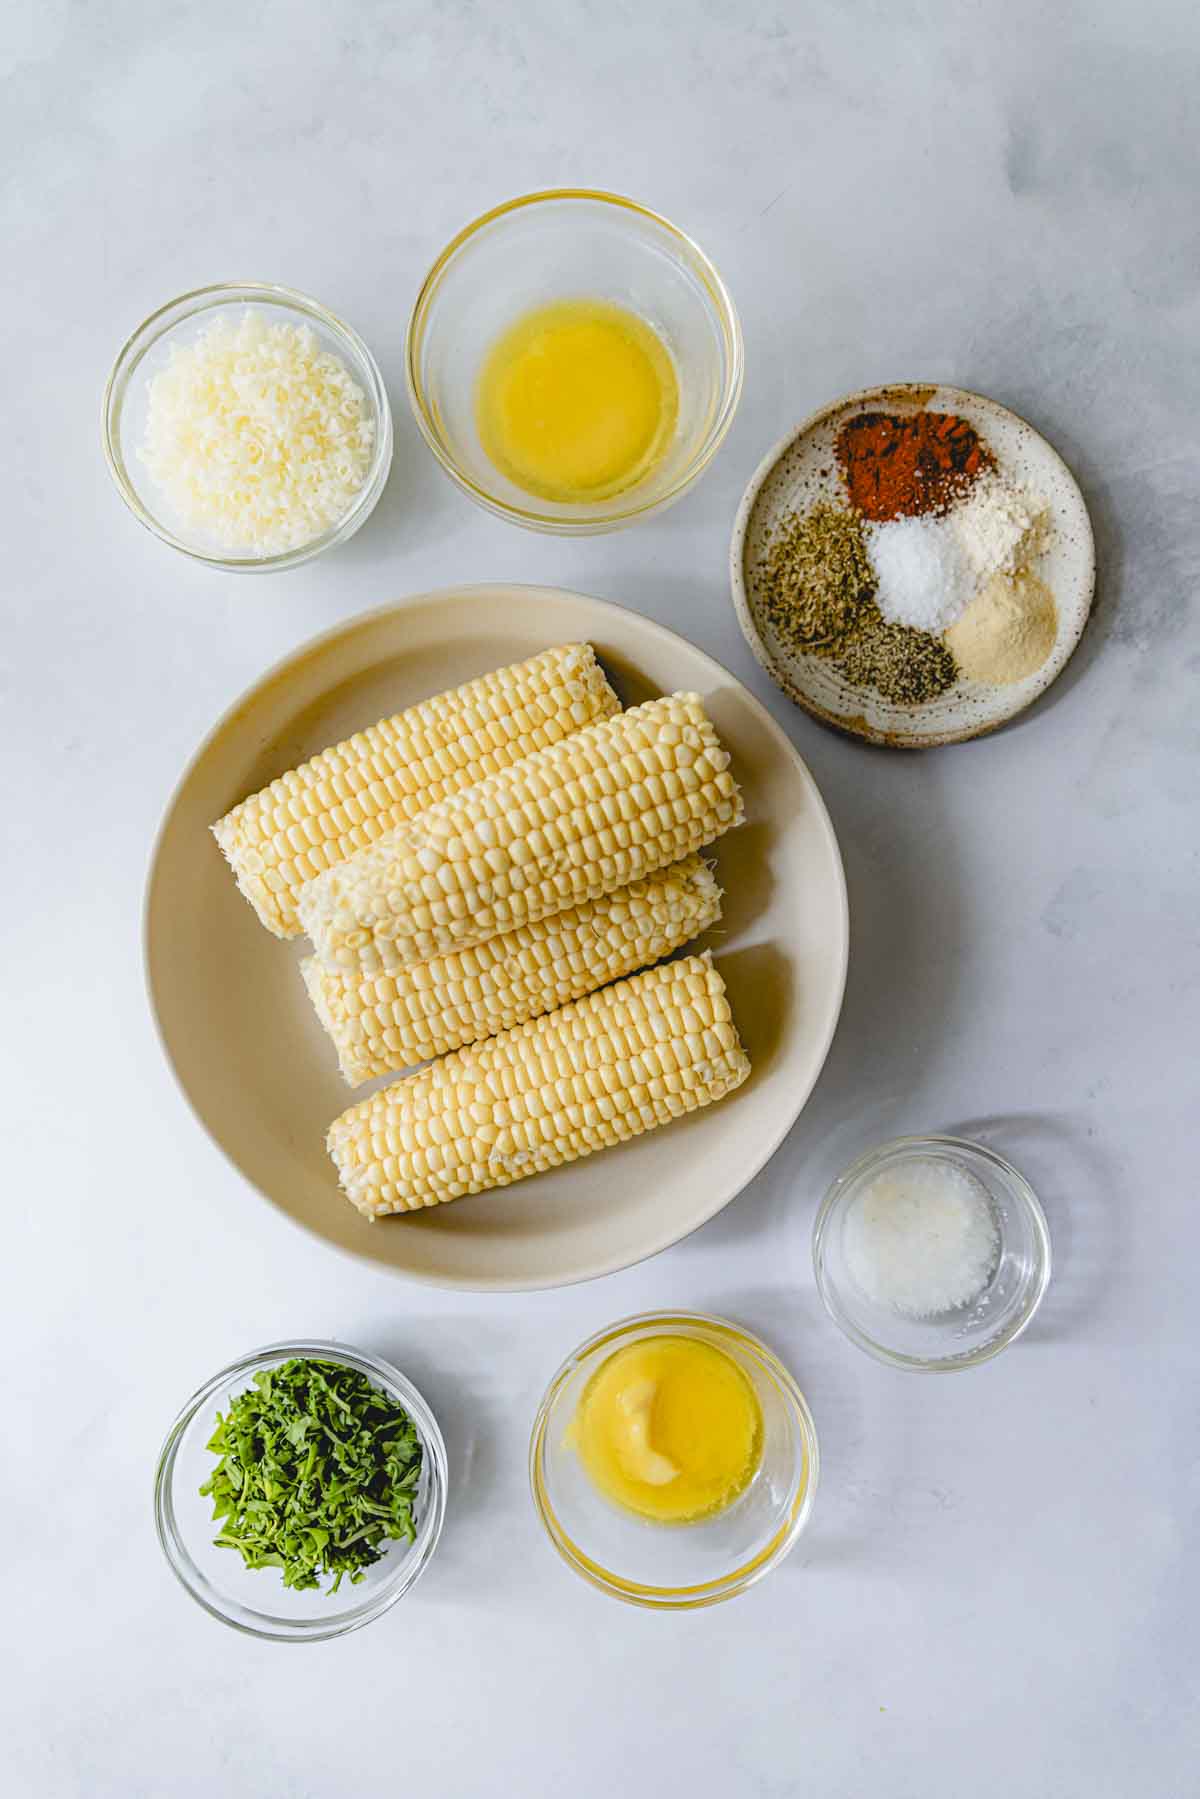
- Corn on the Cob: Grab 4-5 ears of fresh sweet corn with full kernels that burst when pressed gently.
- Butter: Salted butter adds extra seasoning to the spice blend, but you can also use unsalted.
- Spices: Make a homemade blackened seasoning with a mixture of salt, black pepper, paprika, garlic powder, onion powder, and dried oregano. Use sweet paprika for a milder flavor and smoked paprika for more heat. Always choose spices with a good expiration date for the best flavor.
- Avocado Oil: This high-smoke point allows you to char the corn at a high heat without burning. If needed, you can also use coconut oil. I recommend against using extra virgin olive oil as it will burn at high temperatures.
- Parsley: These chopped fresh herbs add a fresh, herbaceous finish to the corn. Chop them fine and sprinkle on to taste. You can use curly or flat-leaf parsley.
- Parmesan: For a rich and savory finish — the perfect complement to the sweet corn. Grated cheese garnishes the best but you can use grated if needed.
Swaps and Substitutions
- Frozen or Canned Corn: Enjoy this summery side any time of year using frozen or canned corn and my notes below.
- Butter: Swap ghee, vegan butter, or coconut oil.
- Cilantro: Chop this leaf herb instead of parsley for a fresh, citrusy garnish!
Full Recipe Below
Find the full list of ingredients & measurements below!
Step by Step Instructions
Are you wondering how to char corn on the stove? I have you with this easy, no-fail recipe!
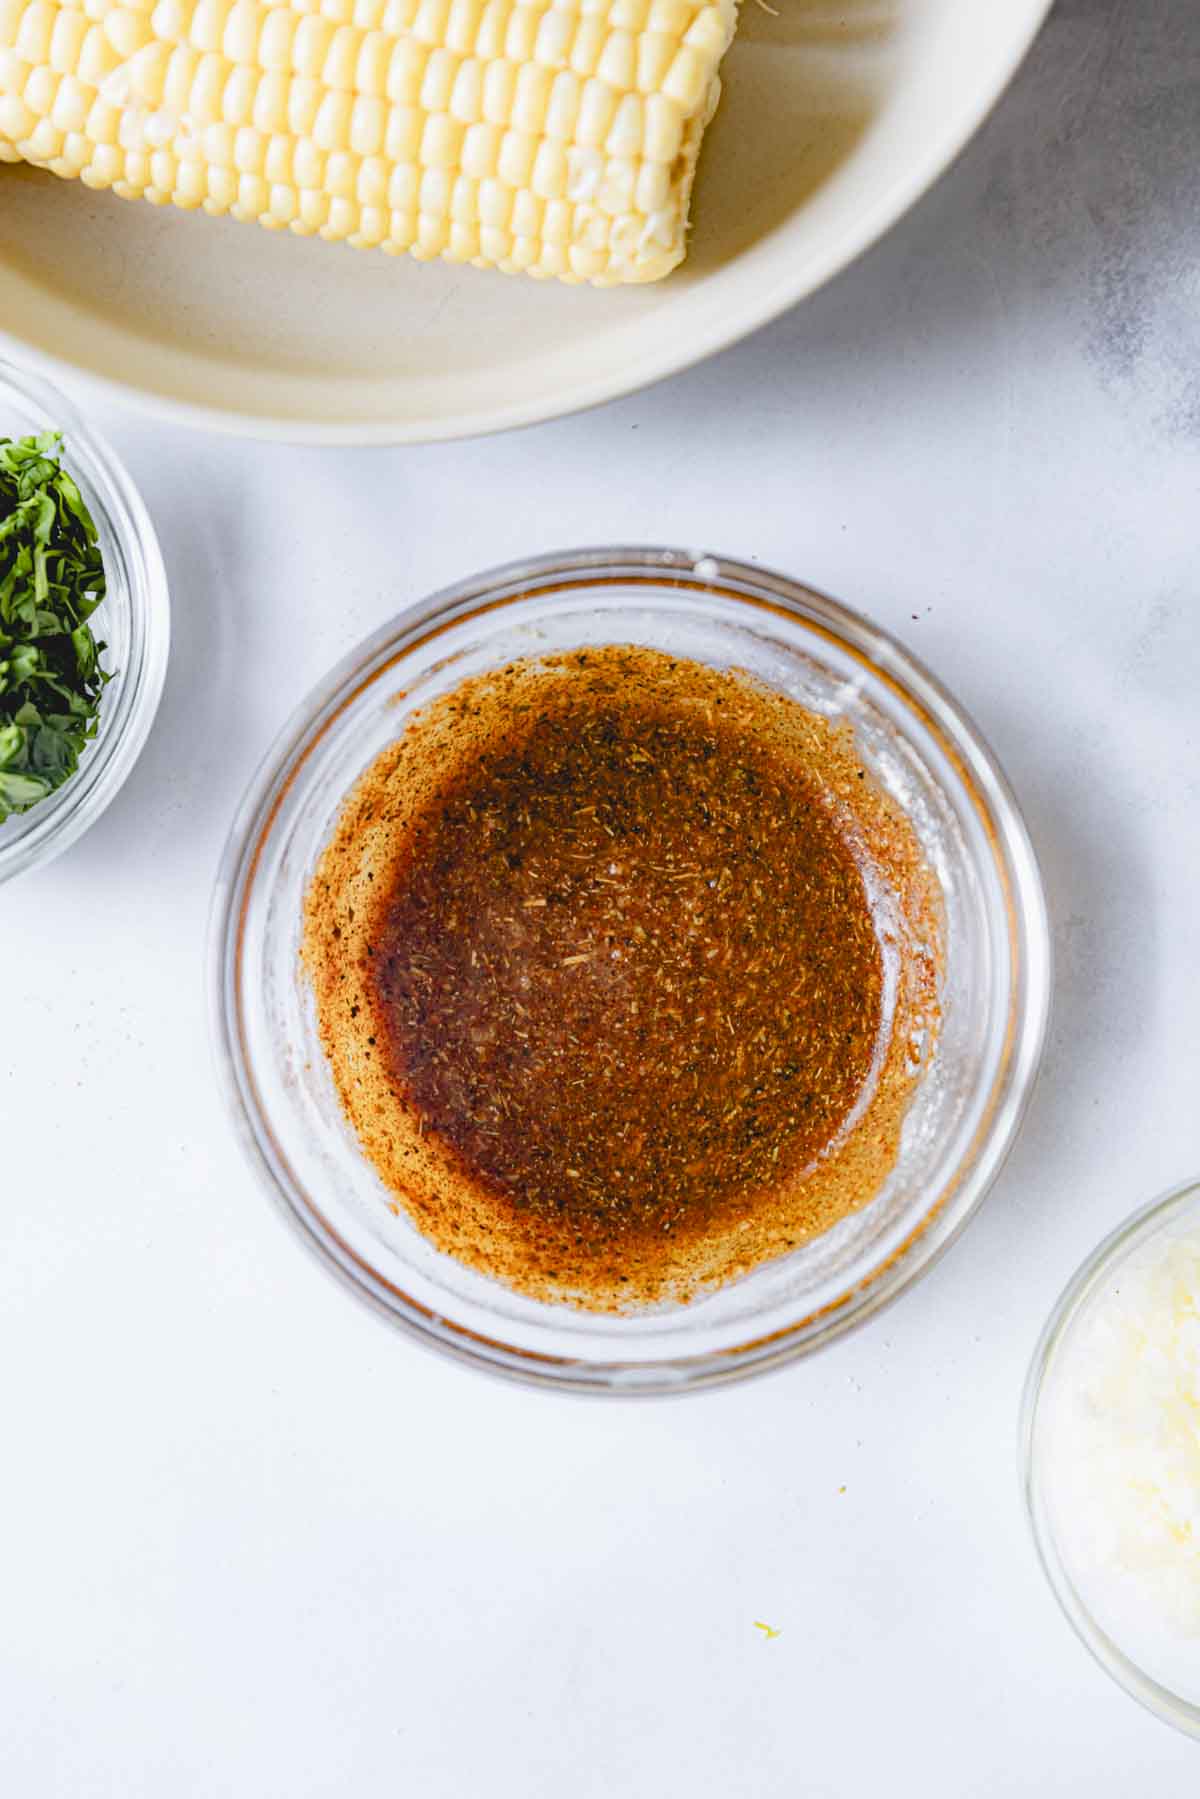
- Step 1: Prepare the seasoning rub by combining the melted butter with the salt, black pepper, paprika, garlic powder, onion powder, and dried oregano.

- Step 2: Brush the butter mixture evenly over the cobs of corn.
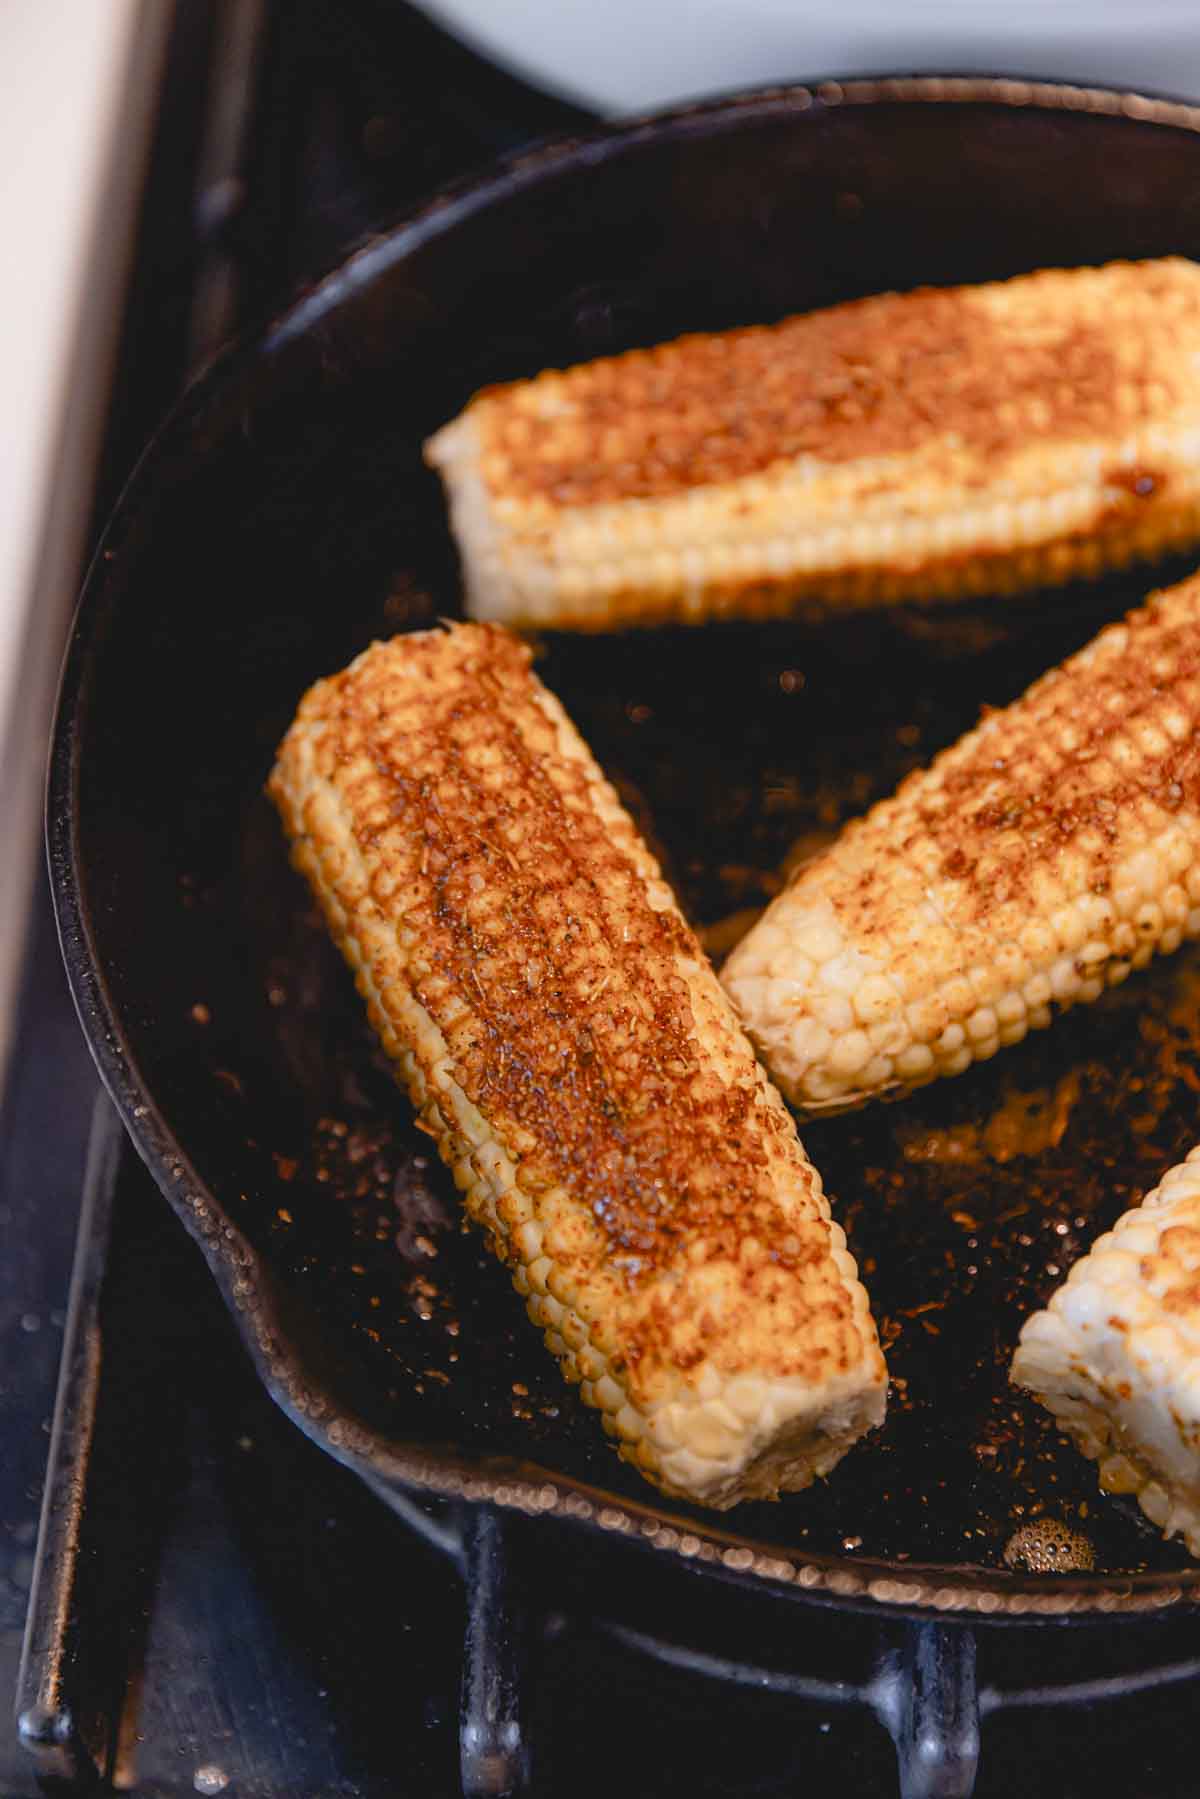
- Step 3: Heat the oil in a cast iron skillet over high heat. Add 2-3 ears of corn to the pan and cook for 2 minutes. Don't touch it before the 2 minutes are up to allow the corn to char perfectly.
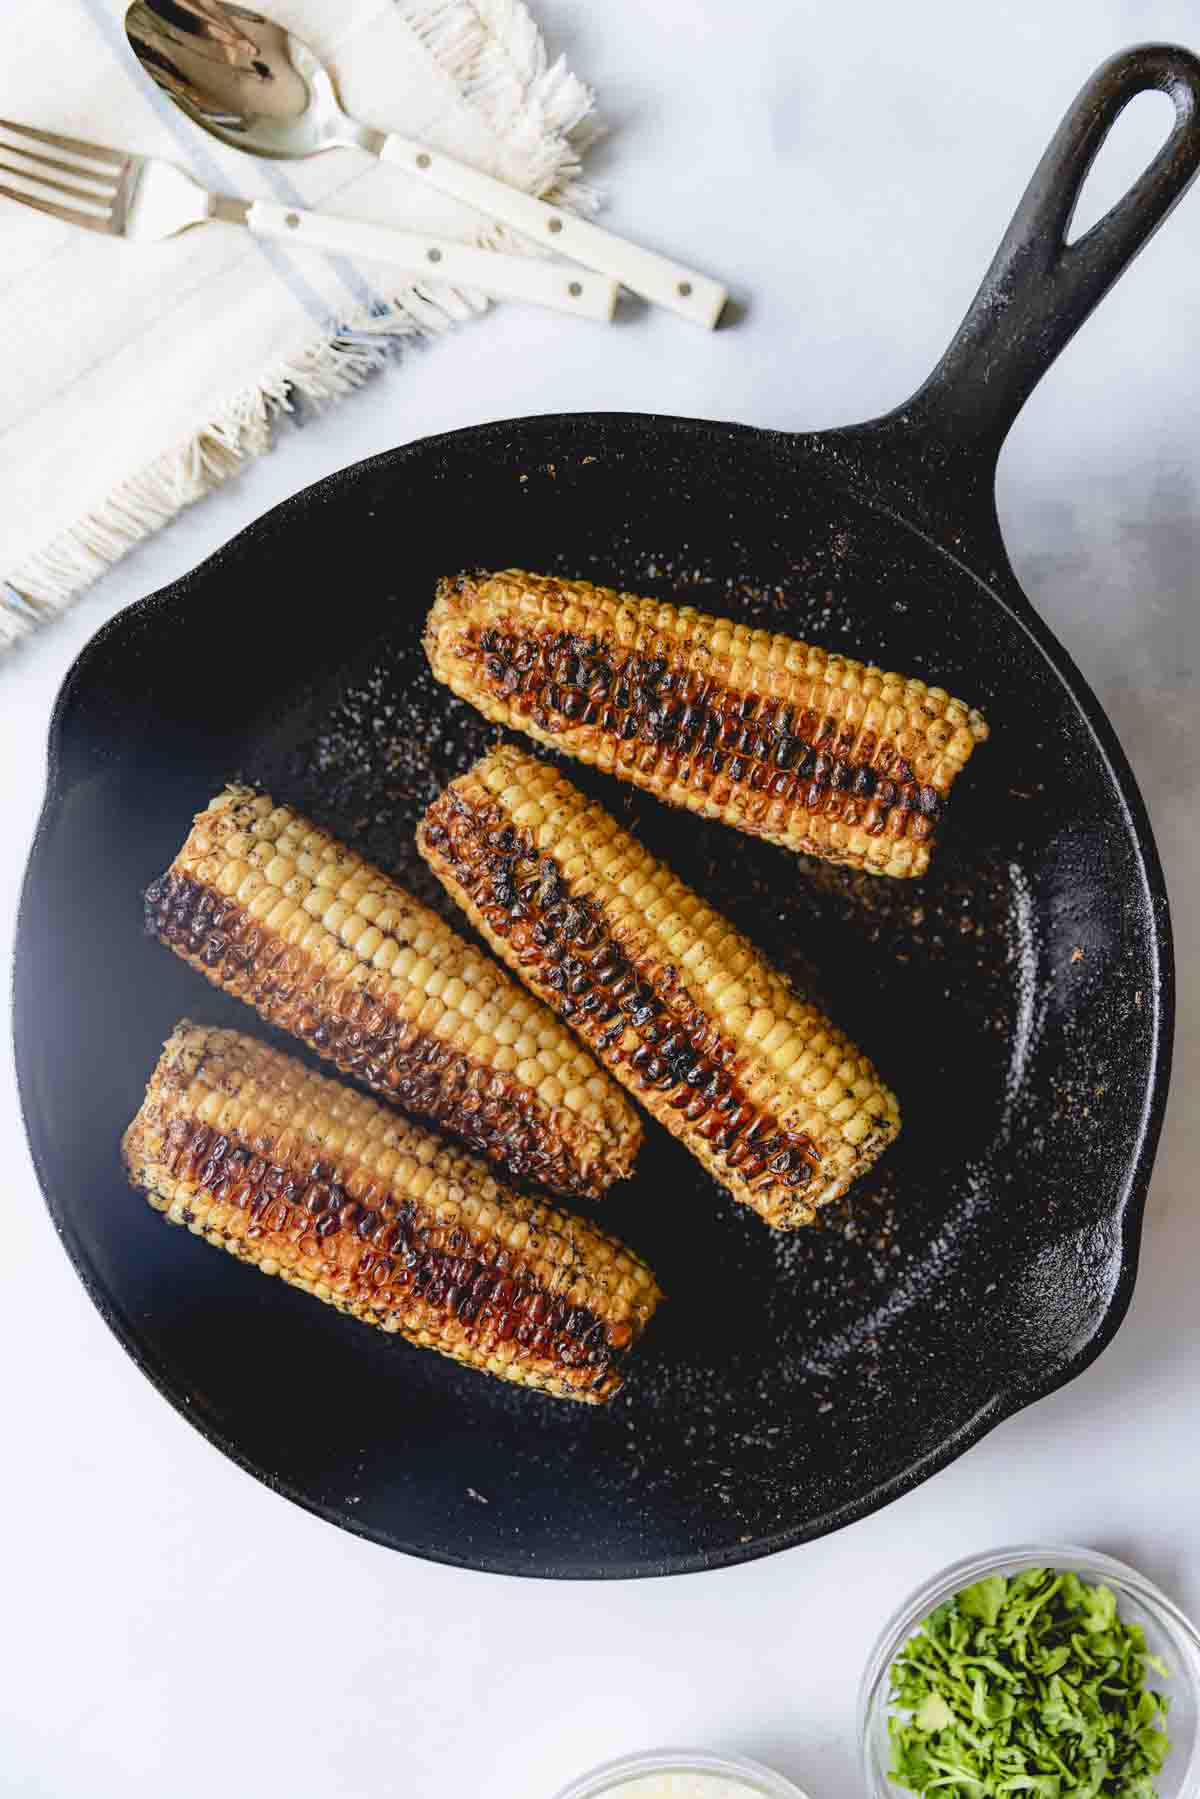
- Step 4: Using tongs, turn the corn over and cook for 2 minutes. Repeat 2 more times until the ears of corn are charred on all sides.
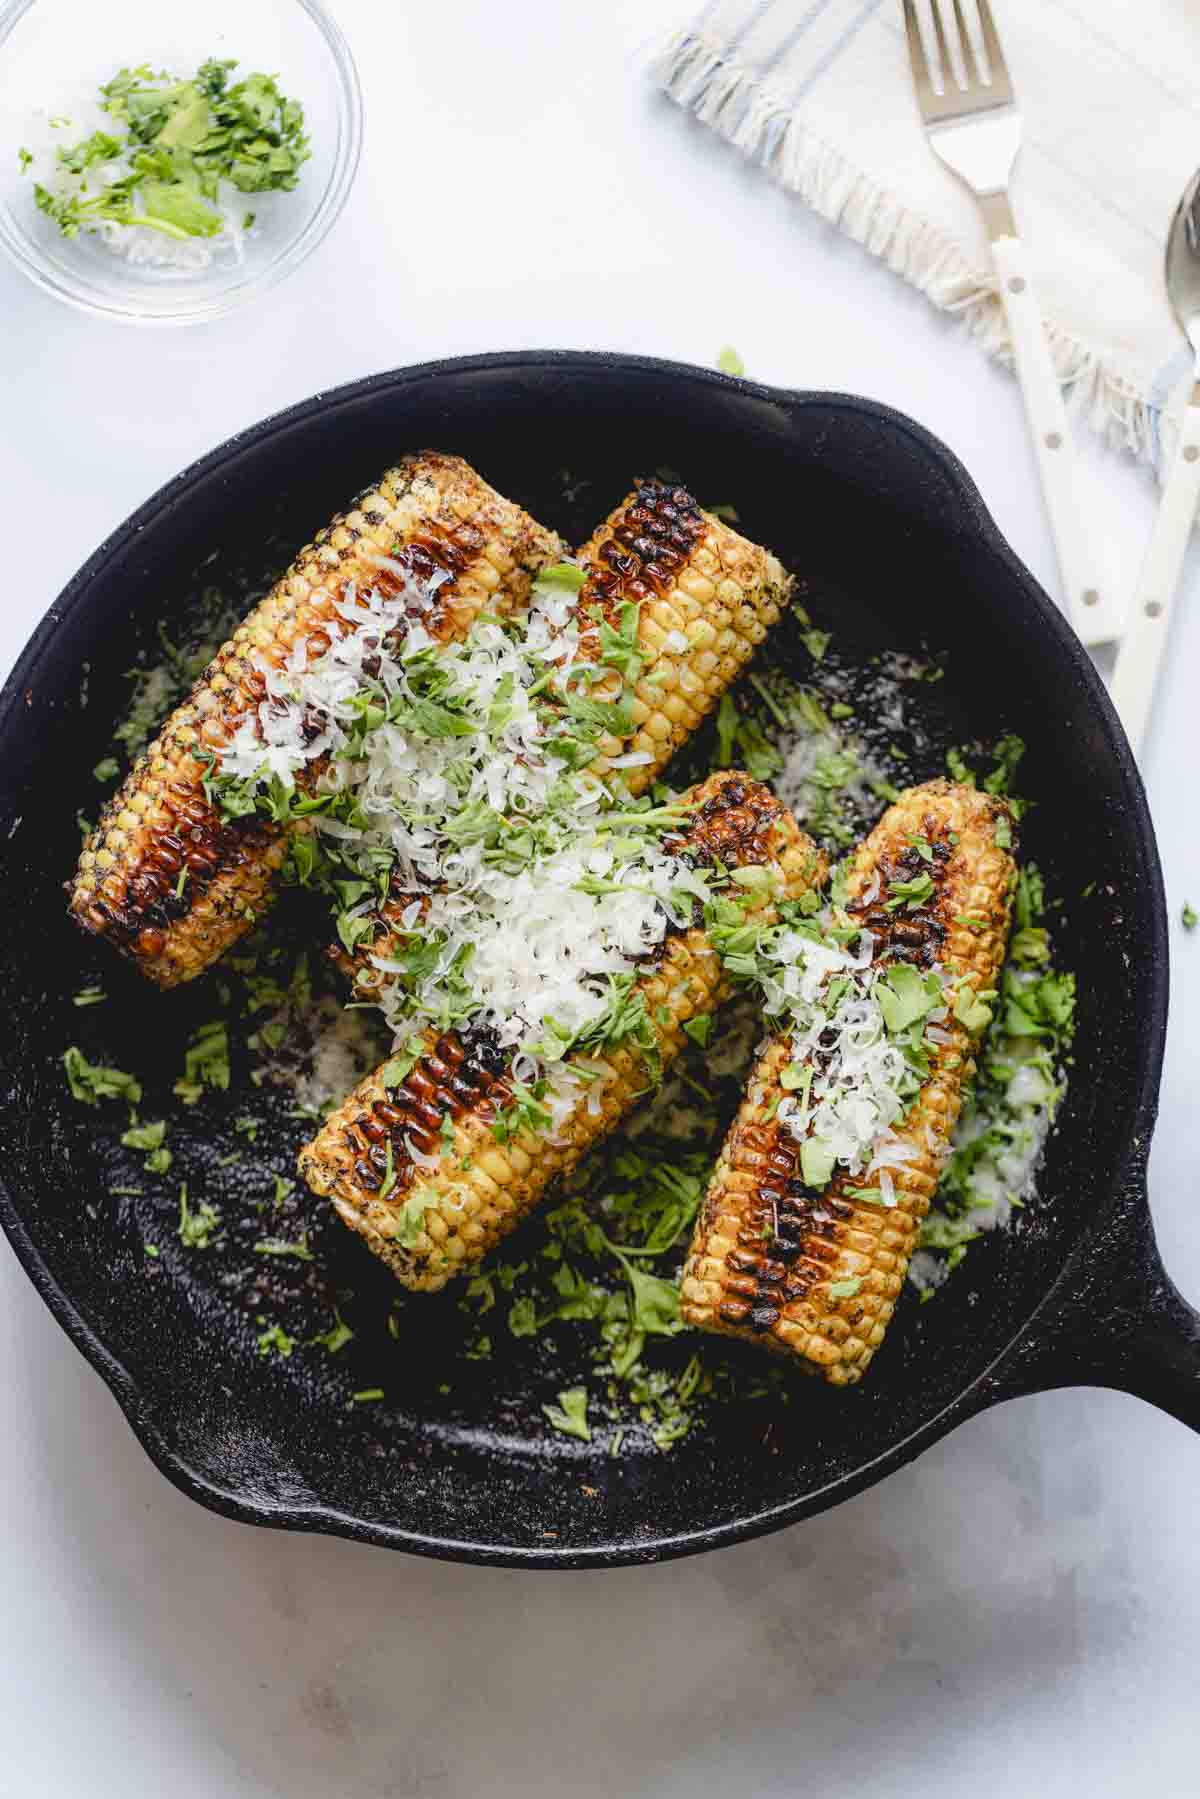
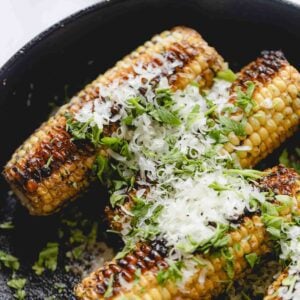
- Step 5: Plate the charred corn and top with freshly chopped parsley and a sprinkle of grated parmesan cheese.
Top Tip
Don't disturb the corn while it cooks. It needs steady contact with the hot skillet to form a crust, so resist the temptation to stir or move it around after turning.
Tips for the Perfect....
- Husk the corn before seasoning. Remove the leafy outer husks and the silky strands between the corn kernels, allowing the corn seasoning to coat each kernel and keeping the pesky strands from getting caught in your teeth.
- Heat the skillet well. You will know it is nice and hot when a drop or two of water sizzles when flicked on it. Most stoves take 2-3 minutes to fully heat a cast iron skillet over high heat.
- Keep the corn warm. Once charred, place the corn in an oven preheated to 200°F to keep it hot while the remaining corn cooks.
- For faster cooking, break the fresh corn cobs in half. Not only do the smaller cobs cook faster, but you can also fit more of them in the skillet.
Recipe Variations
- Mexican-Inspired: Take a south-of-the-border twist on this cast iron corn on the cob by mixing the salt and brown sugar with ¾ teaspoon each of ground cumin, chili powder, smoked paprika, Mexican oregano, garlic powder, and onion powder. Grill as directed, garnishing the corn with chopped fresh cilantro, cotija cheese, and lime juice, or cutting off the kernels and adding them to tacos or taco salads!
- Spicy: Add a spicy kick to the seasoning blend by stirring in up to ½ teaspoon cayenne pepper. For a milder, smoky flavor, use smoked paprika!
- Dairy-Free: Enjoy your vegetables without any of the tummy troubles by using vegan butter or coconut oil and vegan parmesan cheese. You can also omit the cheese altogether.
Storage Directions
- Refrigerating: Leftovers can be stored in an airtight container in the refrigerator for up to 5 days. Though you can freeze the cooked corn on the cobs, the kernel texture can break down upon thawing. I do not recommend doing so unless necessary.
- Reheating: Warm the cobs in the microwave on gentle heat for 60-second intervals until hot.
💡Recipe FAQ
Yes, frozen corn on the cob allows you to enjoy a taste of summer year-round! Defrost the corn by placing the cobs in a bowl of warm water or in an airtight container in the refrigerator overnight. Once thawed, continue with the recipe as directed.
The grill is fantastic for this recipe! Brush the grates with oil before preheating the grill to medium-high. Once hot, add the corn and cook for 6-8 minutes, rotating the corn every 1.5-2 minutes, until evenly charred.
Yep, but the prep will differ slightly. Mix up the seasoning blend as directed, placing it aside. Heat the oil in a cast iron skillet over medium-high heat. Add two cans of drained corn, stirring occasionally, for 4-5 minutes or until starting to golden. Add the seasoning blend and cook, stirring frequently, for 1 minute. Remove the corn from the heat, garnish with the parsley and parmesan, and enjoy hot!
Related Corn Recipes
If you tried this Skillet Blackened Corn Recipe, or any other of the delicious recipes on my website, please leave a 🌟 star rating and let me know how it went in the 📝 comments below. Thanks for visiting!
📖 Recipe
Skillet Blackened Corn
Equipment
- 1 Cast iron skillet
Ingredients
- 4-5 ears of corn
- 2 tablespoon melted butter unsalted
- 1 ½ teaspoon salt
- ½ teaspoon pepper
- 1 teaspoon paprika
- 1 teaspoon garlic powder
- 1 teaspoon onion powder
- 1 teaspoon dried oregano
- 2 tablespoon avocado oil or another oil with high smoke point like coconut oil
- 2 tablespoon butter
- 2 tablespoon fresh parsley chopped
- 2 tablespoon parmesan cheese grated
Instructions
- Prepare the seasoning rub by combining the melted butter with 1 ½ teaspoon salt, ½ teaspoon pepper, 1 teaspoon paprika, 1 teaspoon garlic powder, 1 teaspoon onion powder, and 1 teaspoon dried oregano.
- Brush the butter mixture evenly over the ears of corn.
- Heat the oil in a cast iron skillet over high heat.
- Add 2-3 ears of corn to the skillet and allow to cook for 2 minutes. Don't touch it before the 2 minutes are up to allow the corn to char perfectly.
- Using tongs, turn the corn over and cook an additional 2 minutes. Repeat 2 more times until the ears of corn are charred on all sides.
- Plate the blackened corn and top with freshly chopped parsley and a sprinkle of parmesan cheese.
Notes
- Refrigerating: Leftovers can be stored in an airtight container in the refrigerator for up to 5 days. Though you can freeze the cooked corn on the cobs, the kernel texture can break down upon thawing. I do not recommend it unless it is necessary.
- Reheating: Warm the cobs in the microwave on gentle heat for 60-second intervals until hot.
- Husk the corn before seasoning. Remove the leafy outer husks and the silky strands between the corn kernels, allowing the corn seasoning to coat each kernel and keeping the pesky strands from getting caught in your teeth.
- Heat the skillet well. You will know it is nice and hot when a drop or two of water sizzles when flicked on it. Most stoves take 2-3 minutes to fully heat a cast iron skillet over high heat.
- Keep the corn warm. Once charred, place the corn in an oven preheated to 200°F to keep it hot while the remaining corn cooks.
- For faster cooking, break the fresh corn cobs in half. Not only do the smaller cobs cook faster, but you can also fit more of them in the skillet.

Leave a Reply