


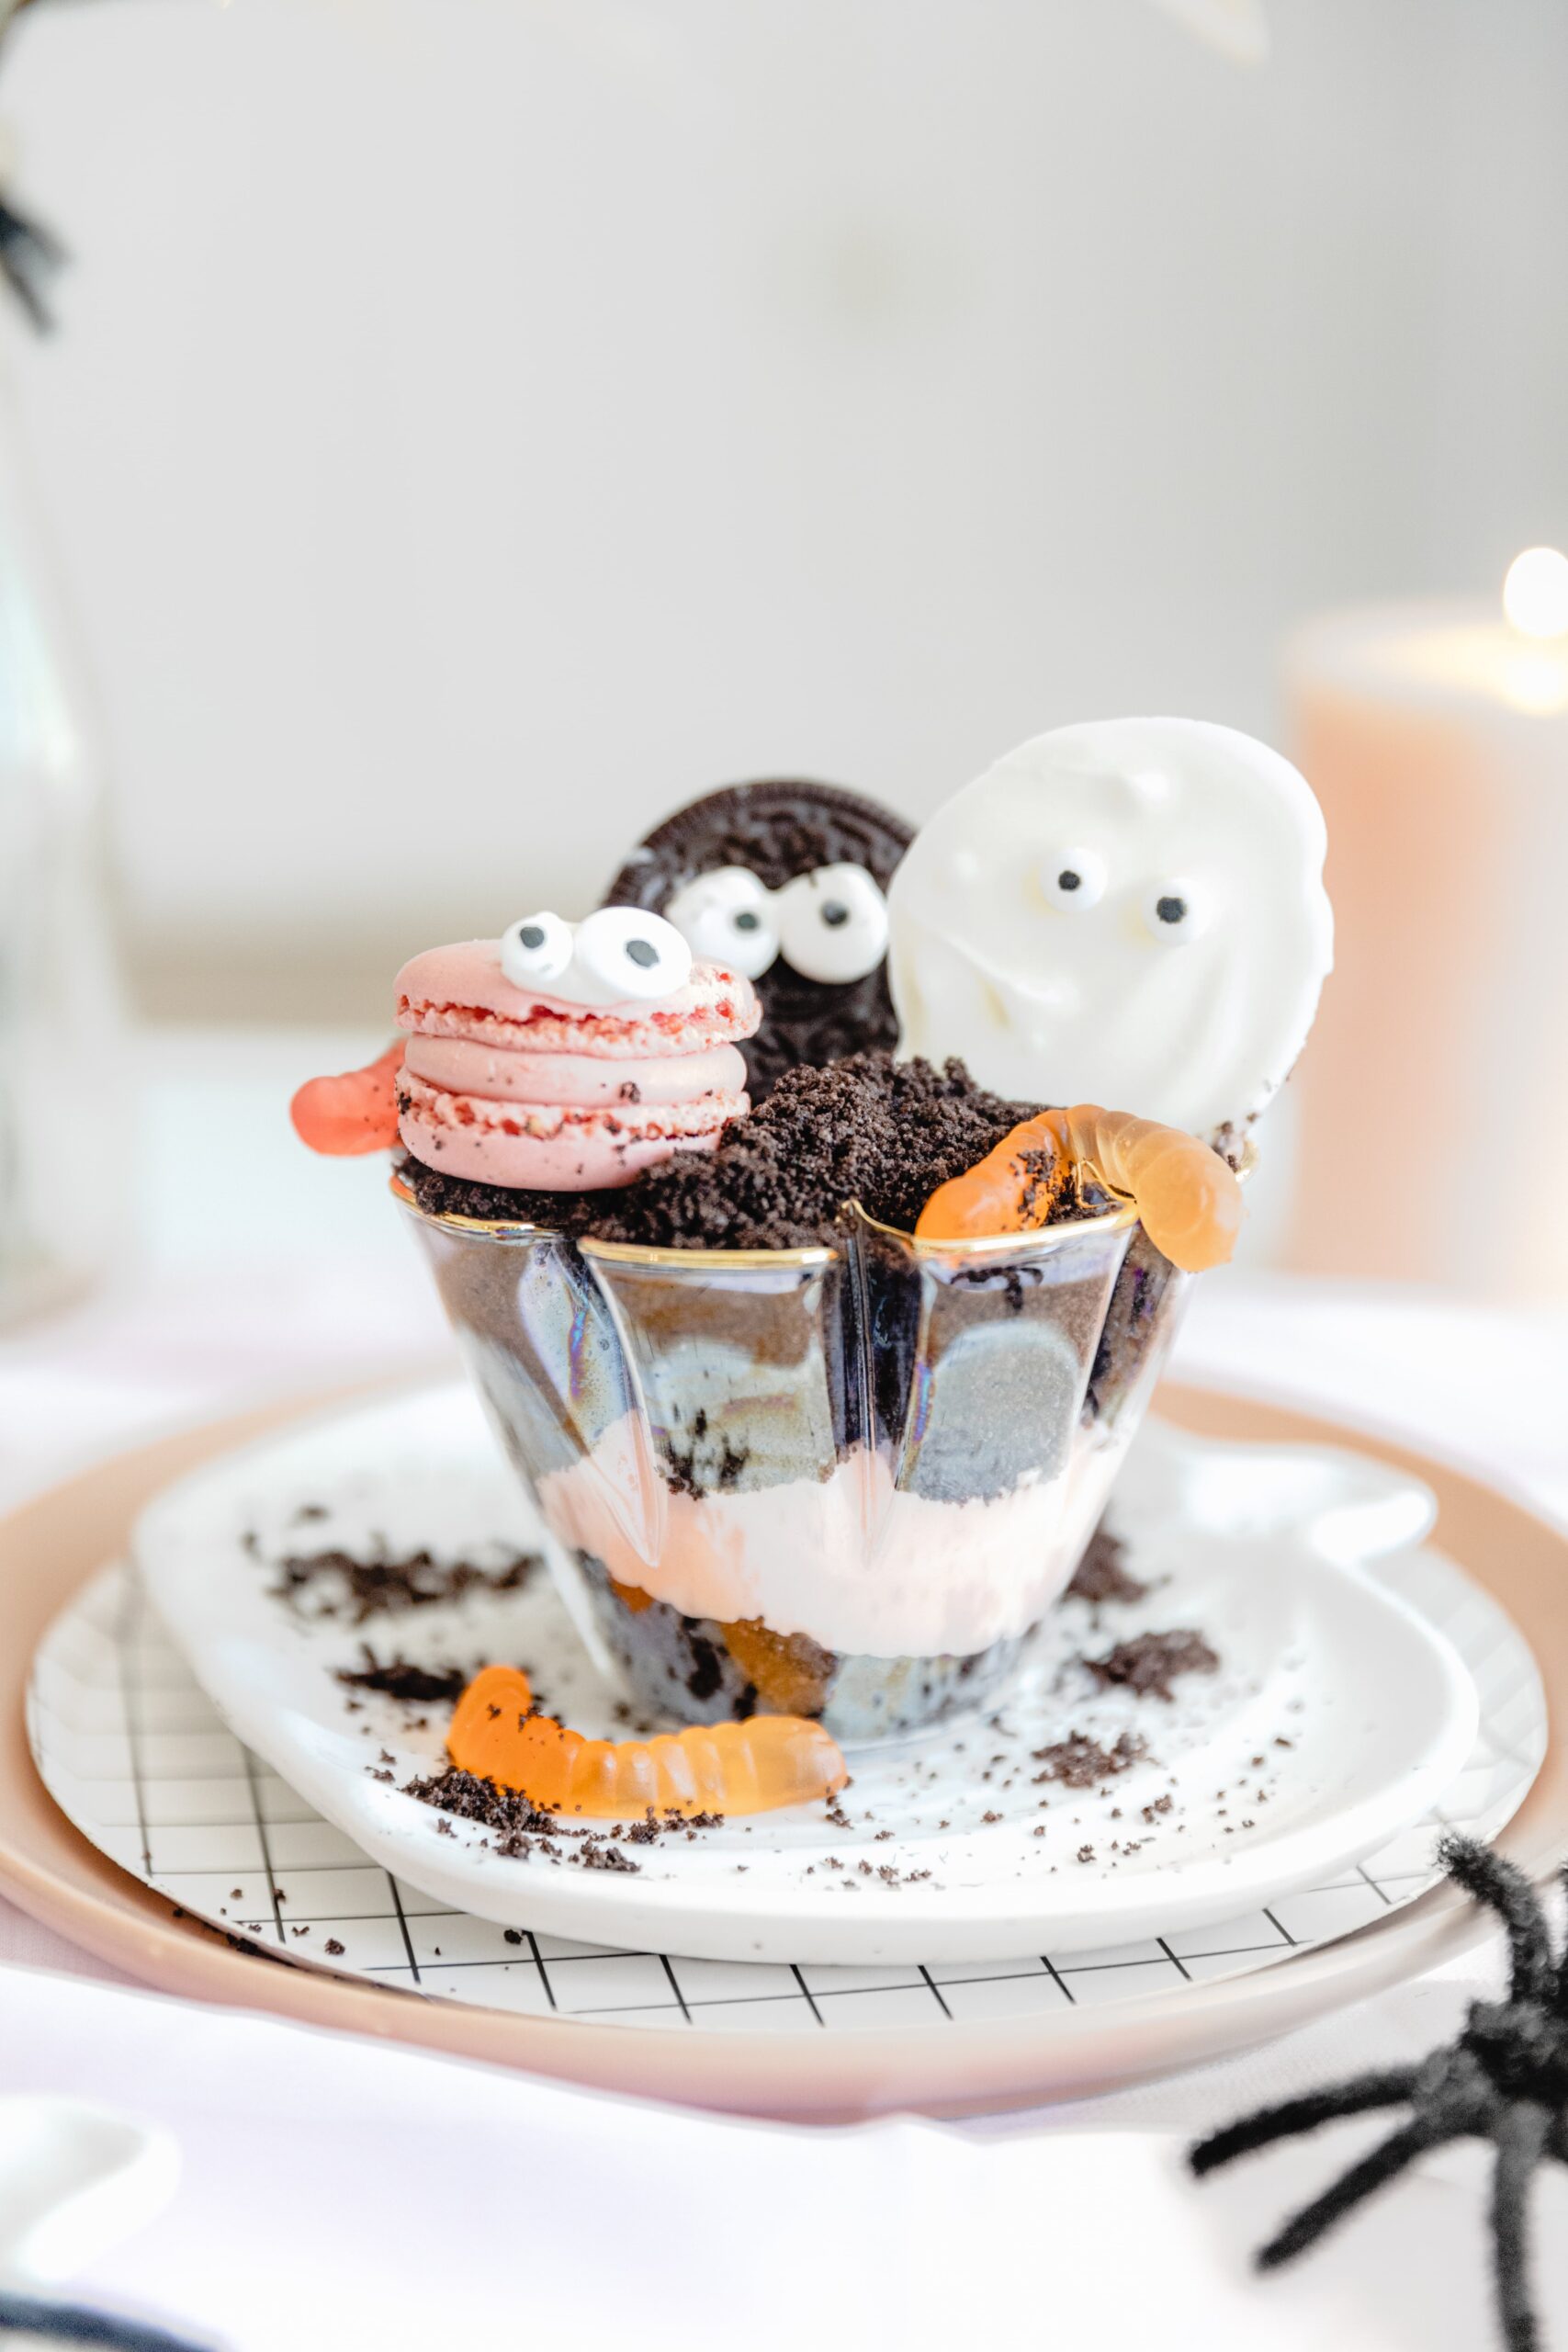
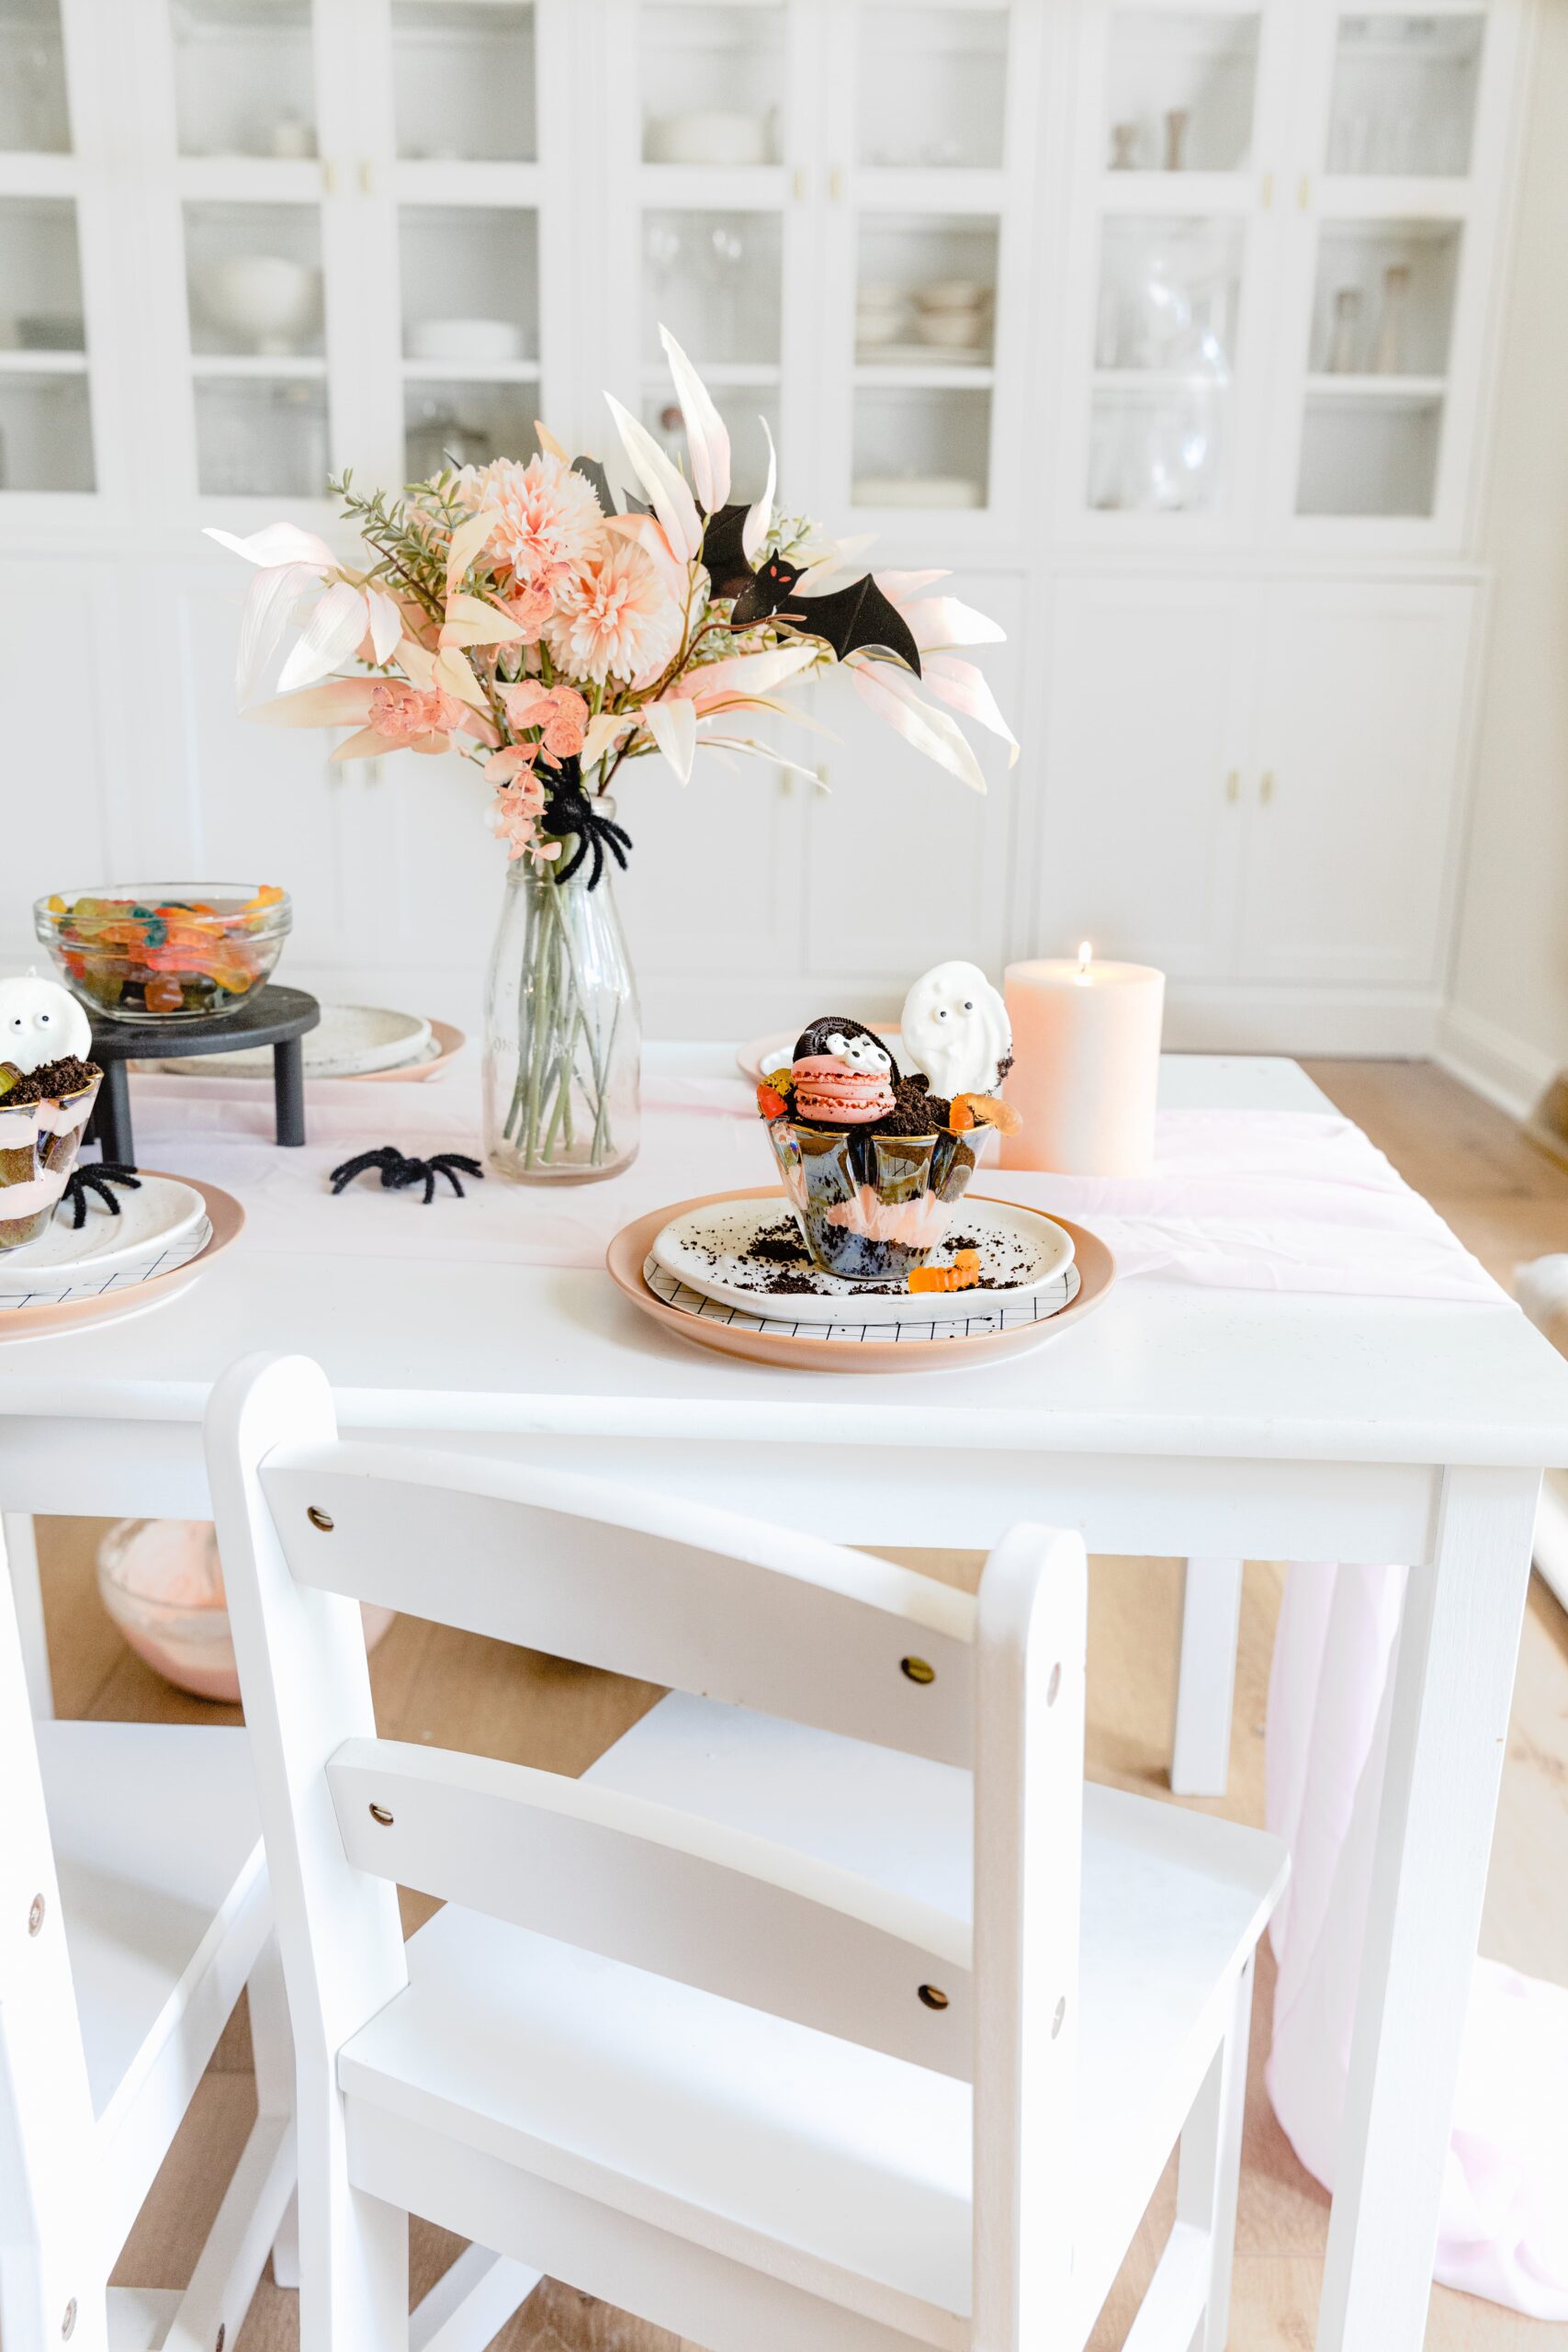
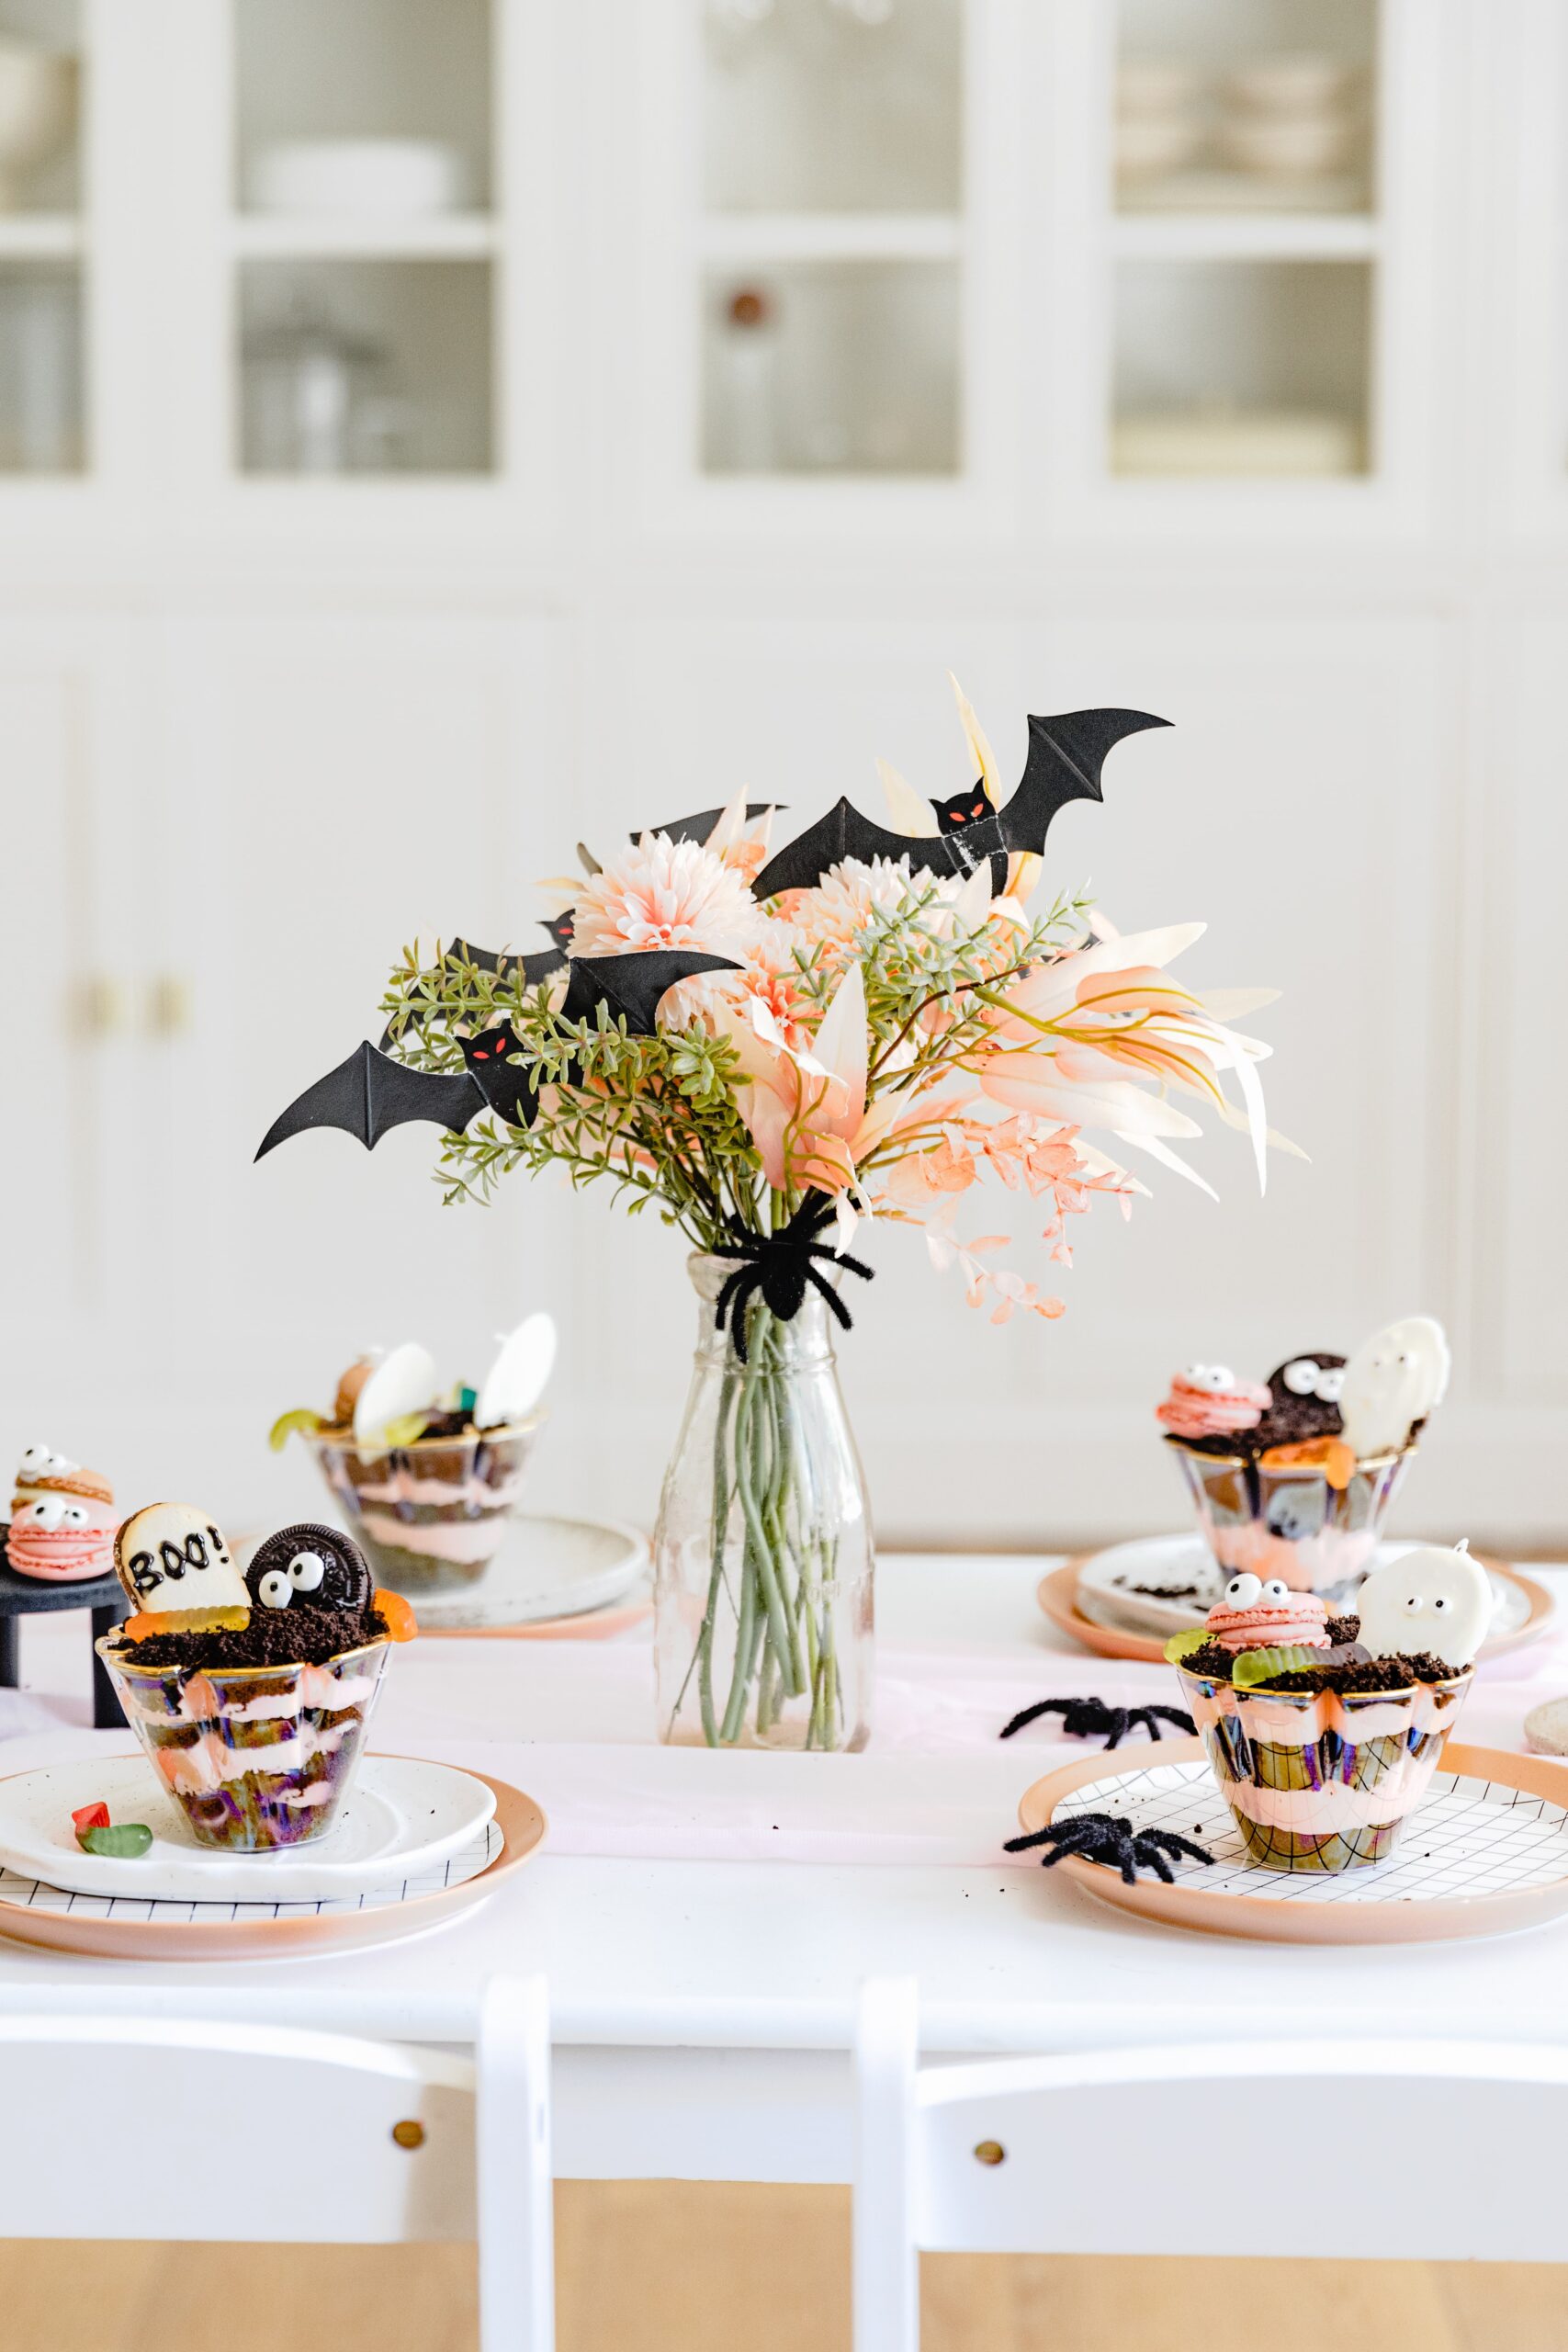
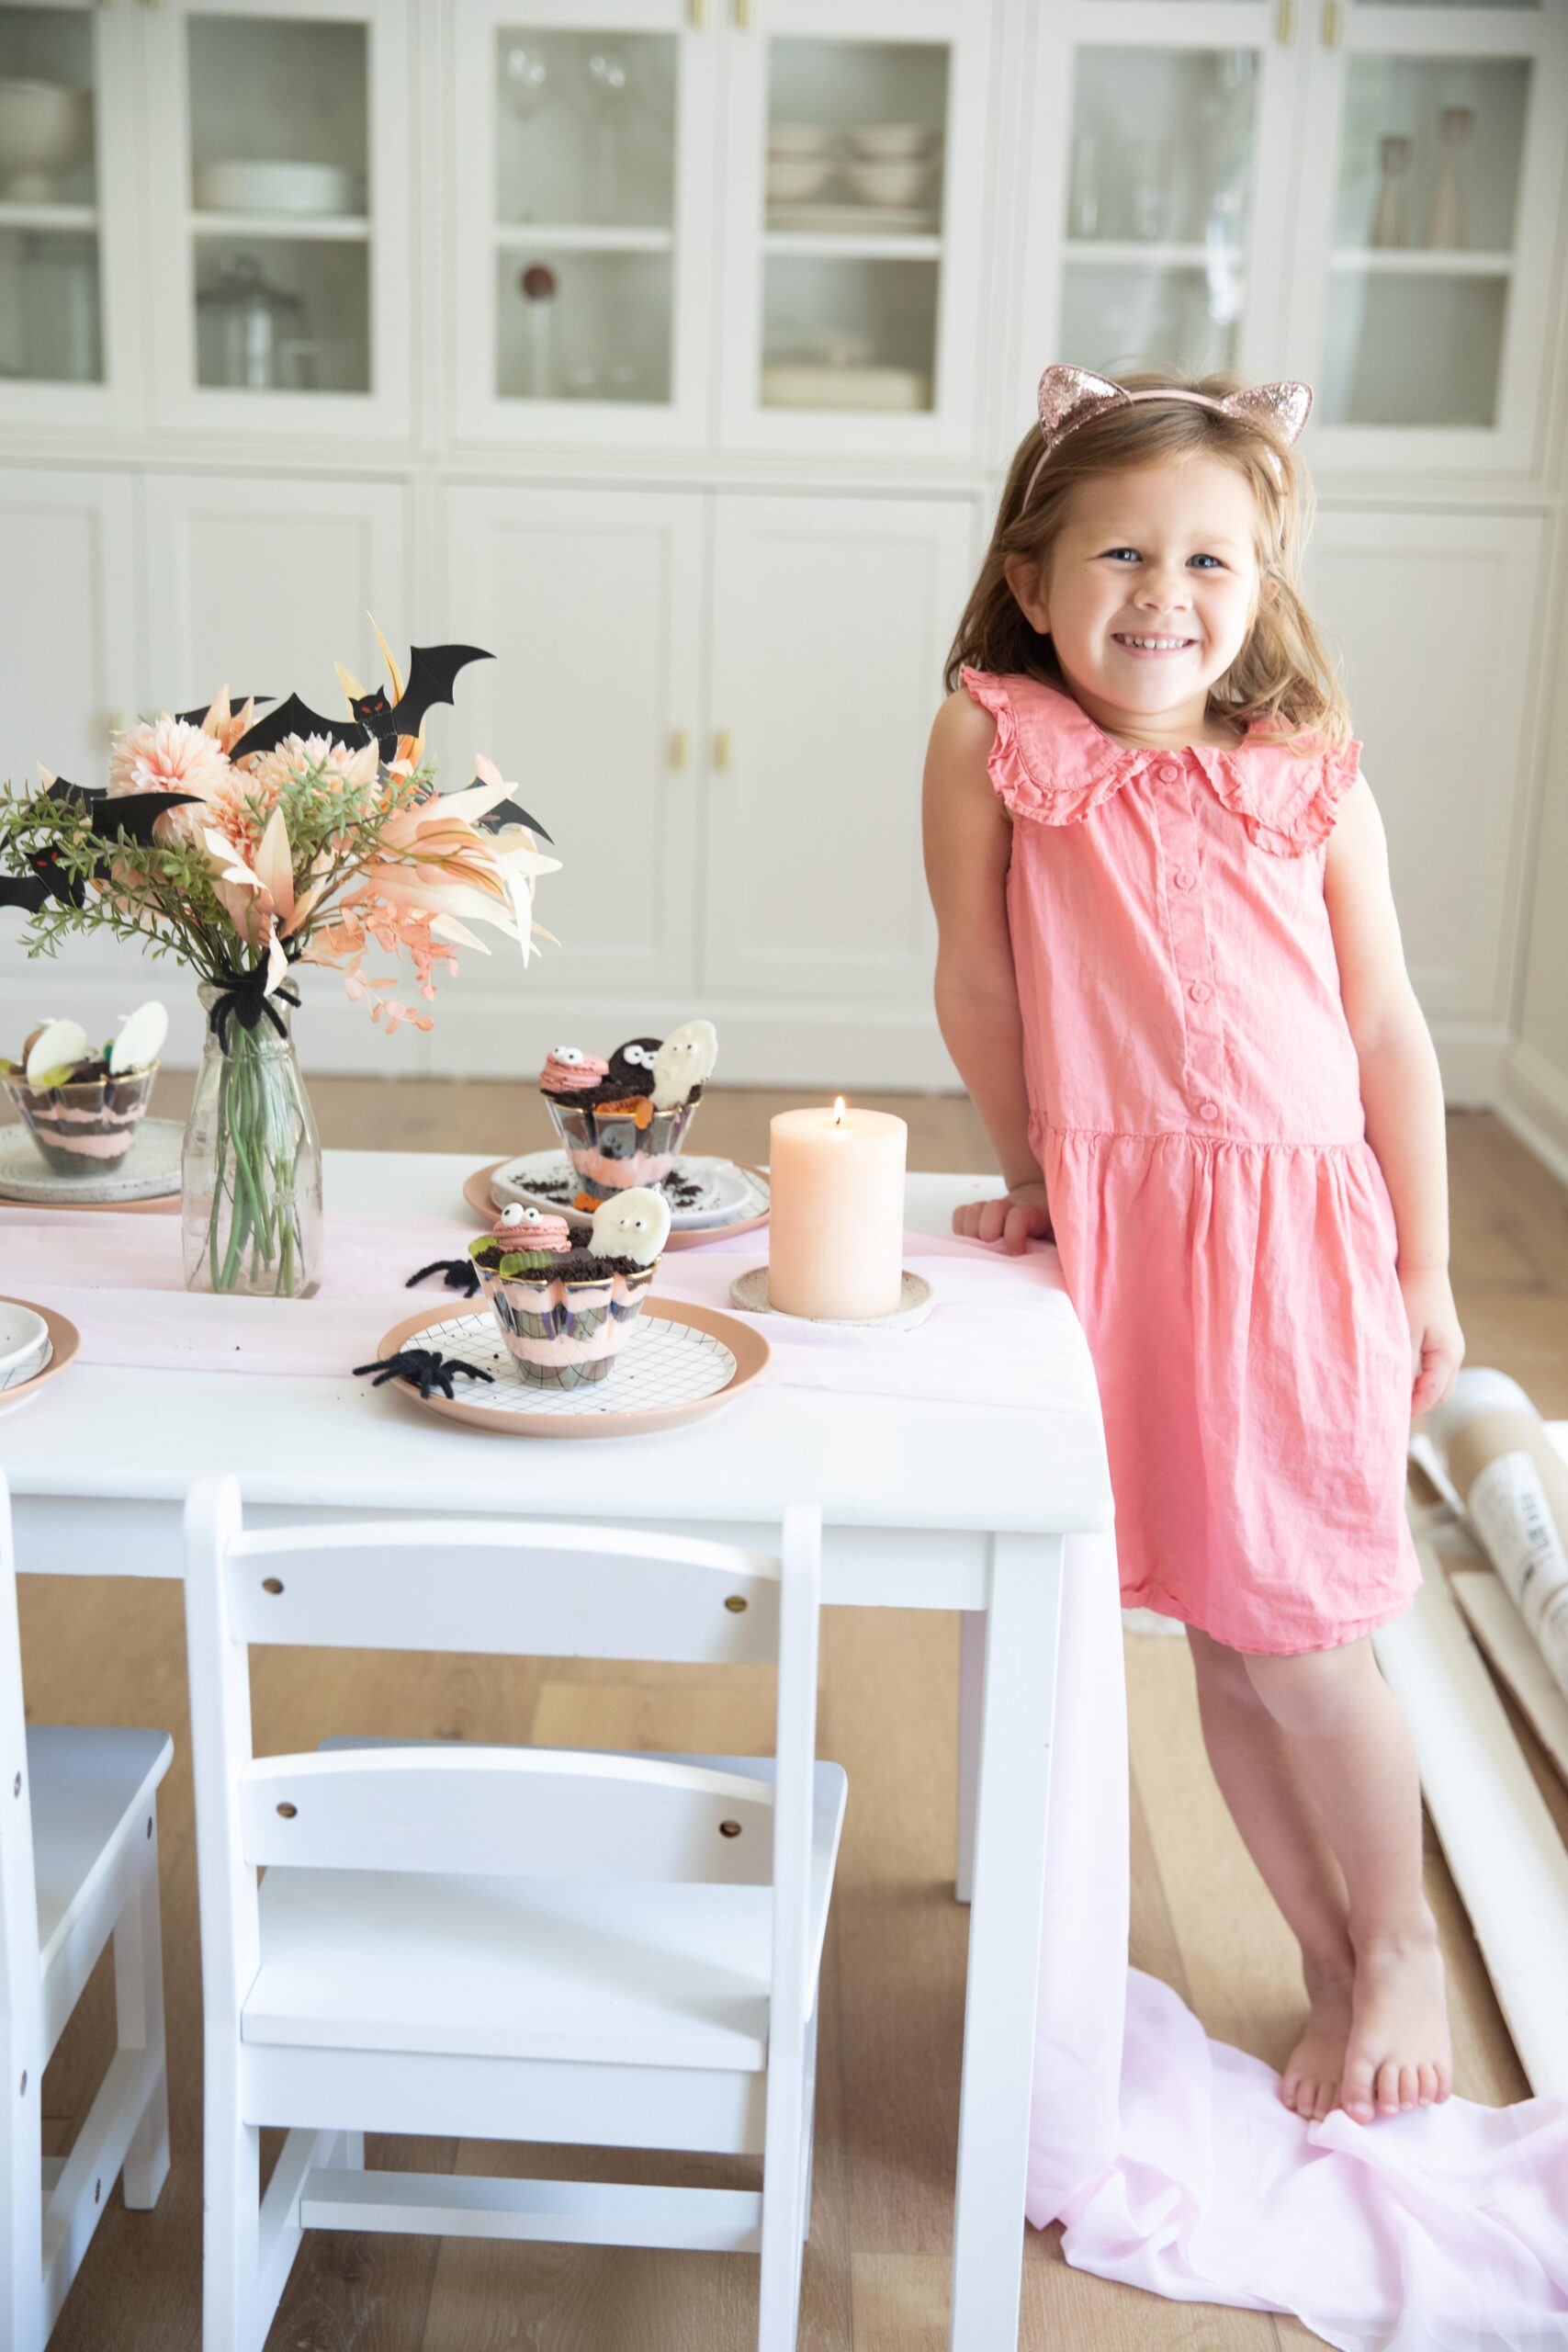
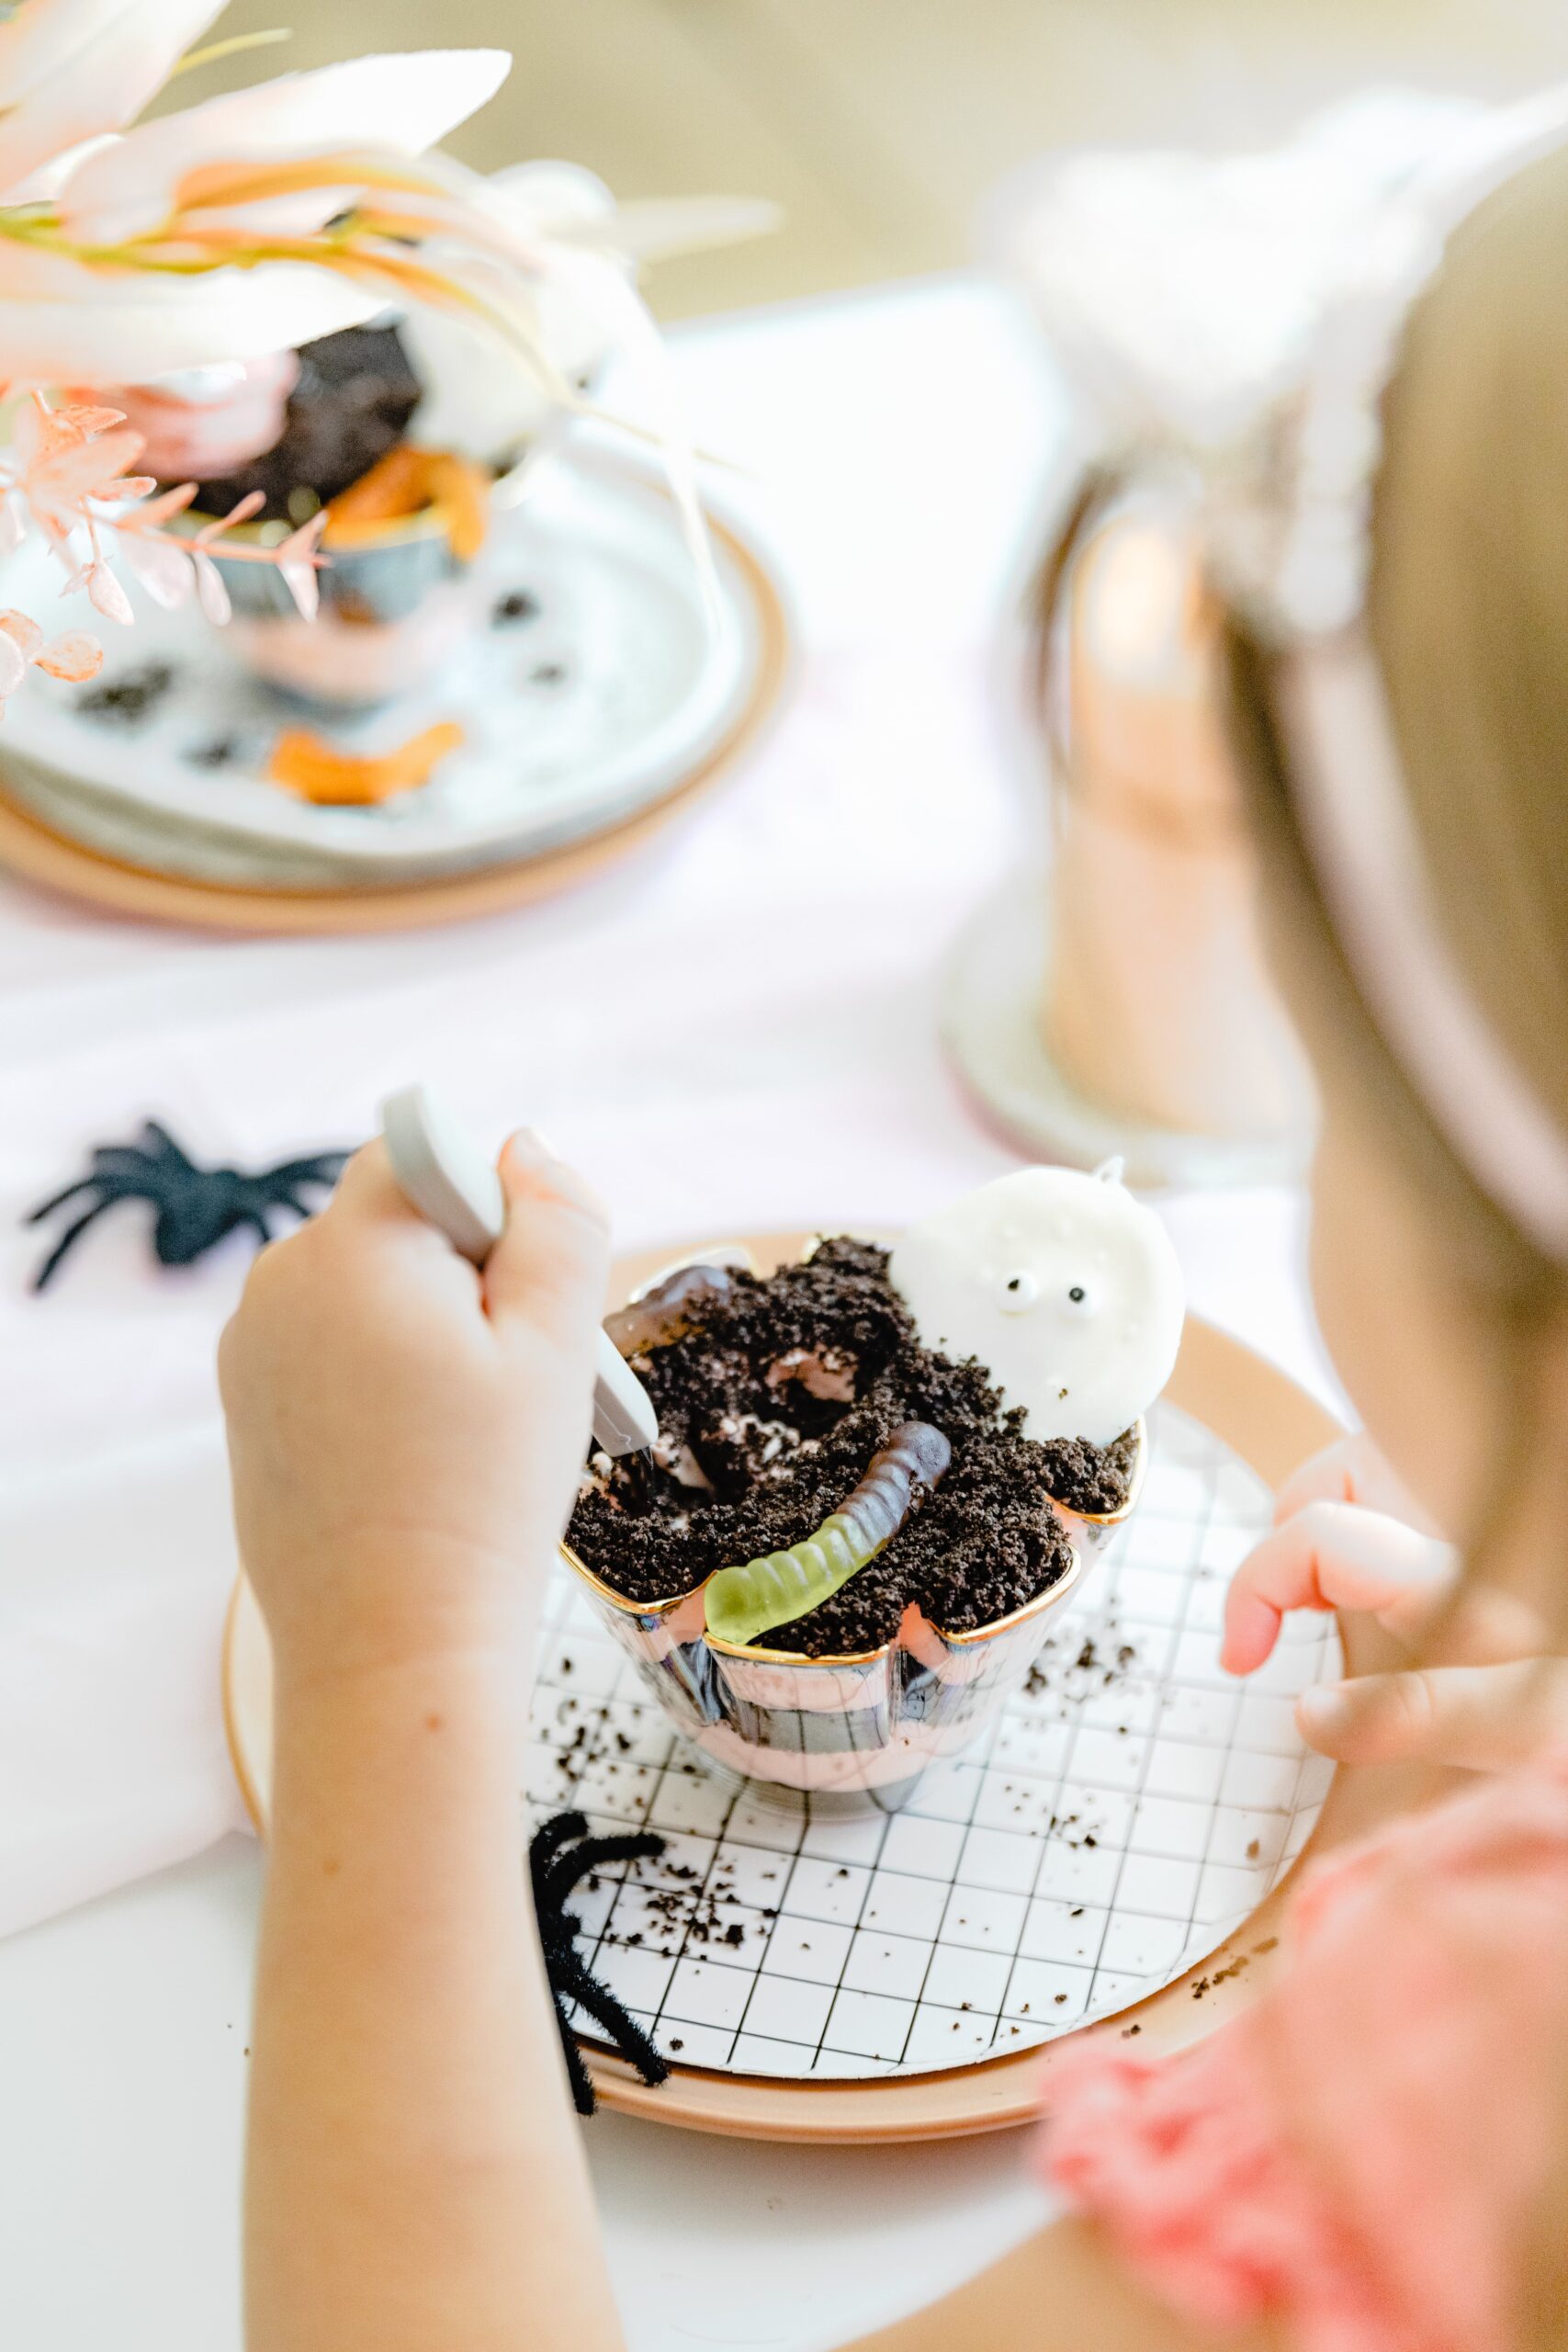
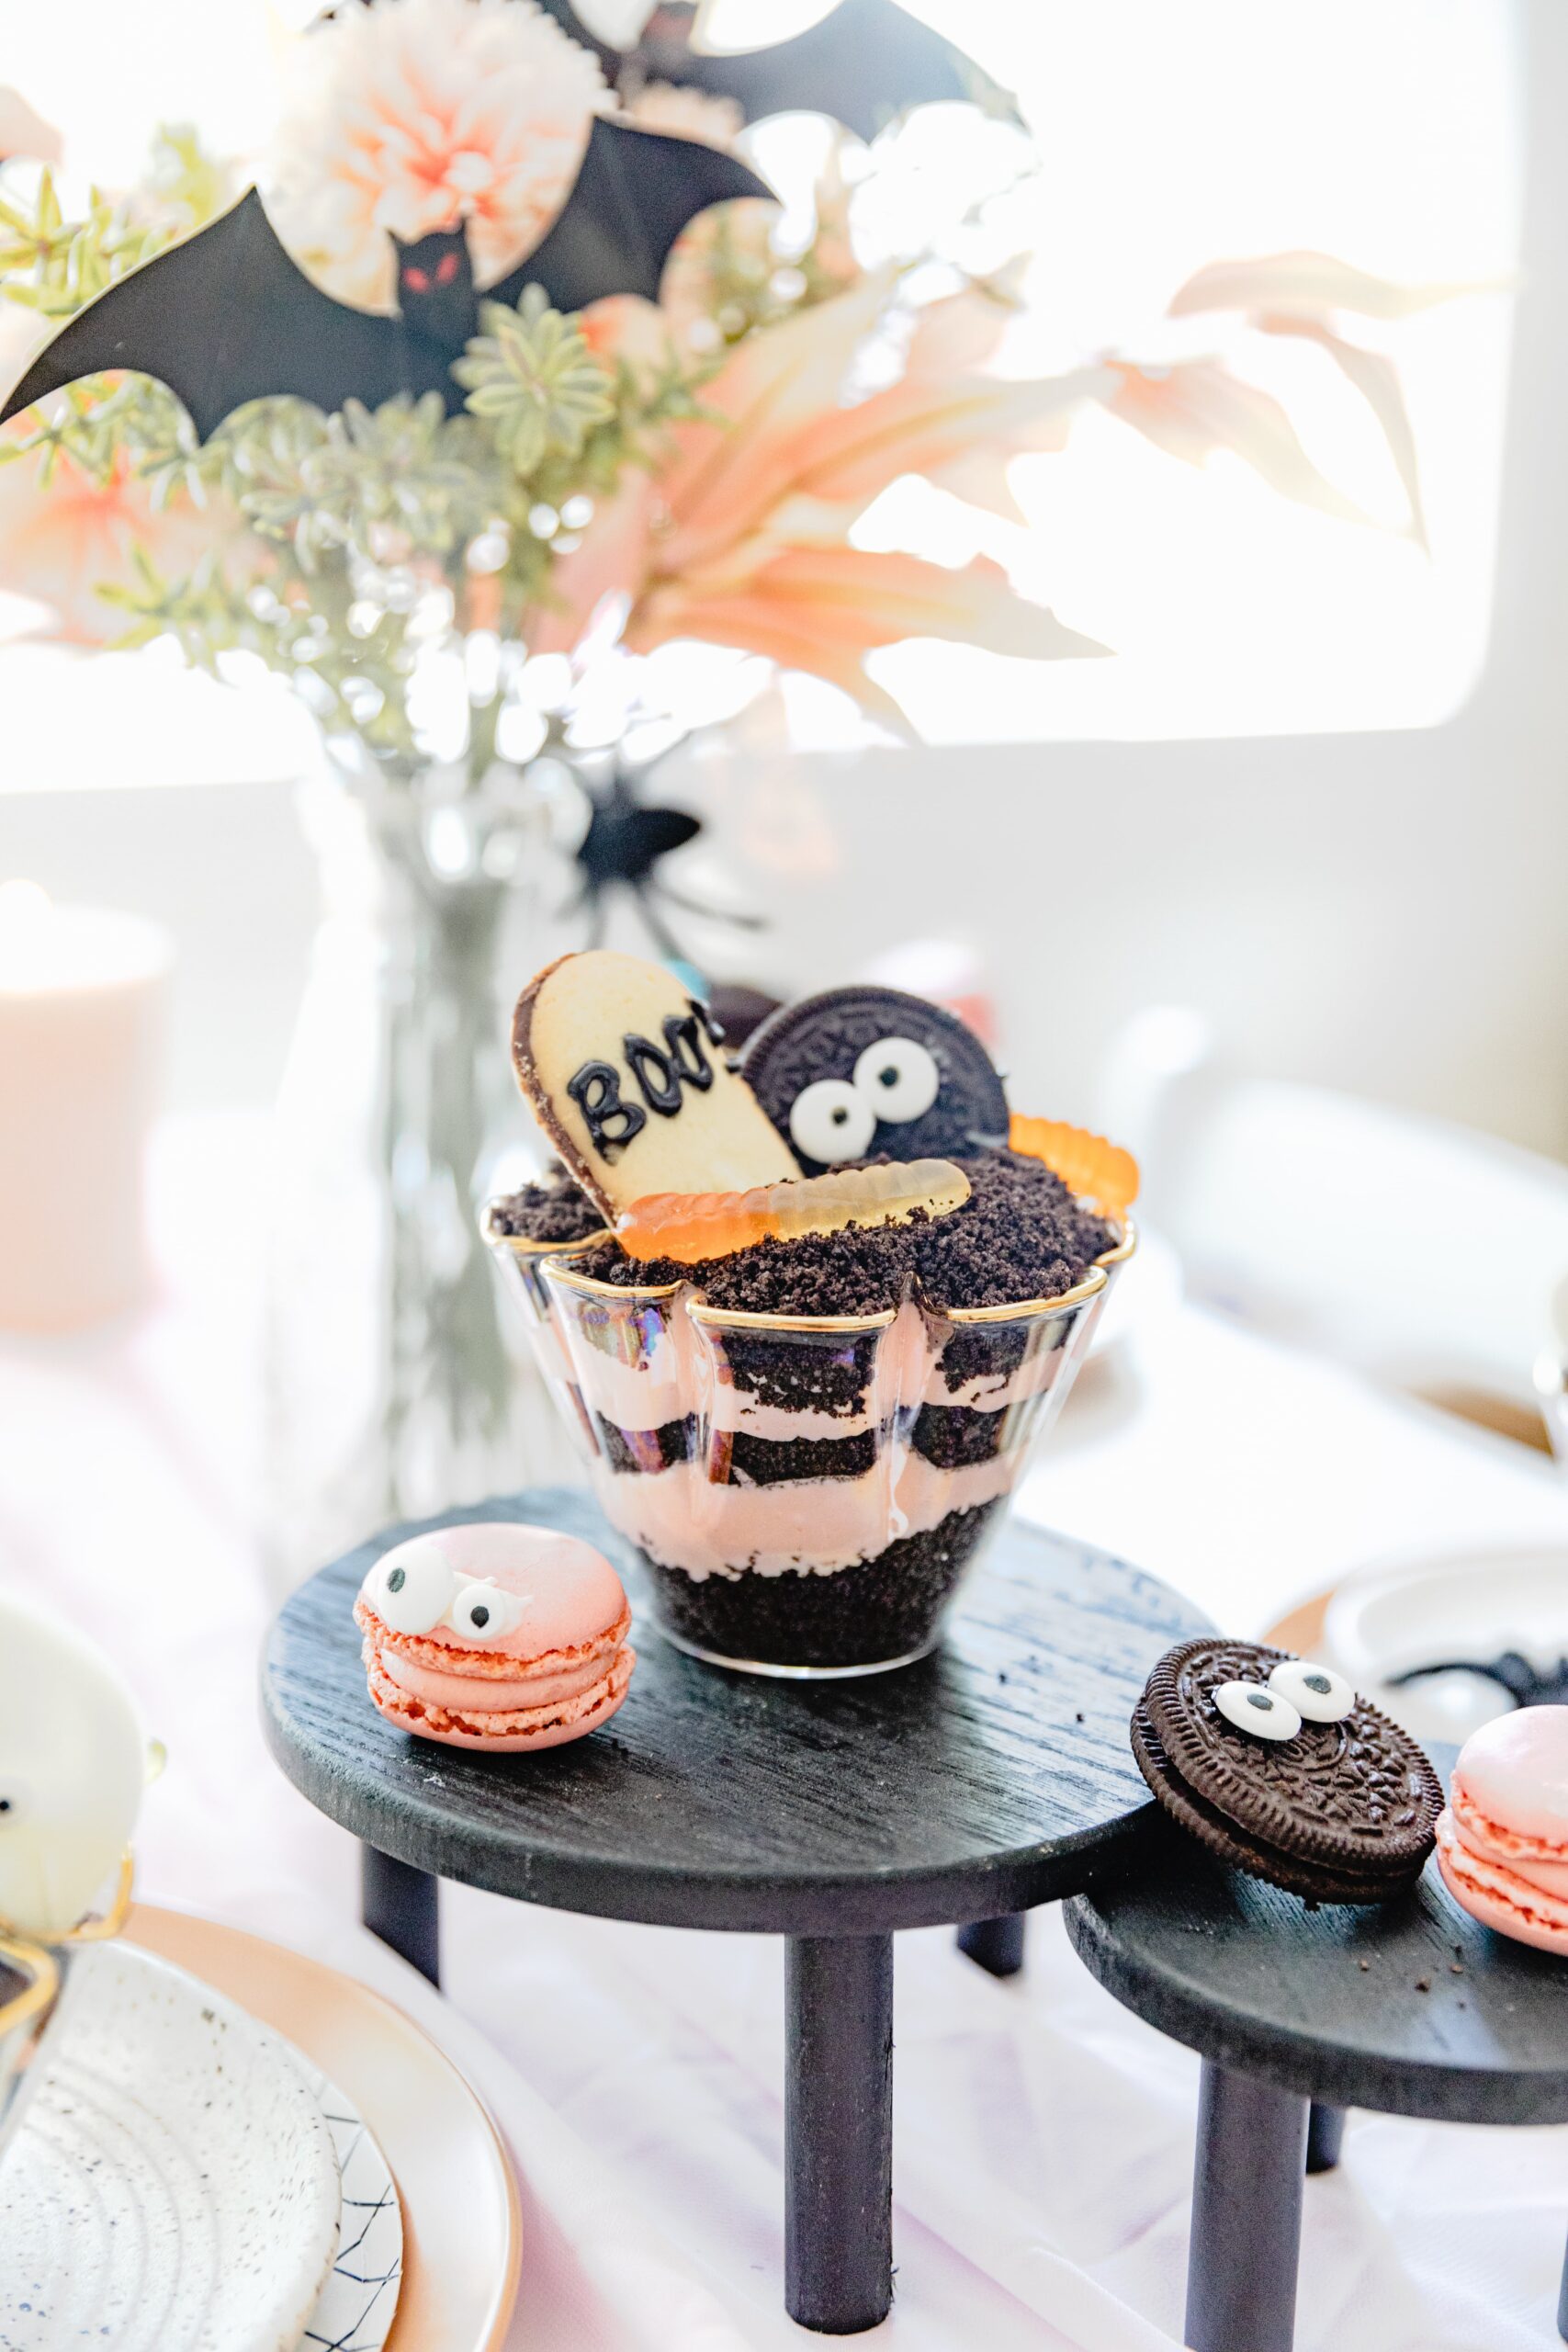
I think by now you know I'll use any excuse to create a fun little treat with my daughter, and Oreo dirt cake is a nostalgic dessert for me! It is layered with pudding, crushed Oreos, and gummy worms...My Halloween Dirt Cake is a fun and festive twist on this classic layer cake.
All About Oreo Dirt Cake
Derived from a 1960's classic dessert, Mississippi Mud Pie, I vividly remember childhood birthday parties having "dirt and worm" cake!
It's simply individual cups, or even a trifle, layered with delicious crushed up Oreo cookies and creamy a vanilla or chocolate pudding mixture. In between the layers, there were gummy worms.
All together it looked like a big ol' cup of dirt and worms. Gross...but also delicious? Kids are easily entertained.
Why You'll Love Dirt Cake Halloween Cups
I knew I needed to put a fun spin on this dessert and what better time to have kiddos eating dirt and worms than halloween?! There are quite a few reasons to love this dessert...
- First, they are SO easy to make. Taking less than 10 minutes to mix, which made whipping this up with Rosie an easy task. Perfect for kids helping in the kitchen!
- The ingredients are simple and easy to find.
- Budget friendly! This serves quite a few people and if you are looking to serve dessert to a crowd, this might just be the ticket.
- You can customize it in many ways! From changing up the colors of the pudding to trying out different Oreo flavors.
- They are perfect for prepping ahead of time for a class party, Halloween party, or just for an afternoon snack.
Ingredients For Dirt and Worm Cups
Like I mentioned above, the ingredients are SO simple which makes this one of my favorite go to desserts for any holiday, but especially fun for halloween!
Oreo Cookies - they make the perfect, crumbly, not-to-sweet balance to the creamy pudding mixture. I chose to use regular chocolate oreo cookies.
Vanilla Pudding - grab one of these packets in any flavor really! Traditional dirt cakes might also have chocolate pudding to really sell the "dirt" part. But I used vanilla so I could use food coloring to make it pink.
Cream Cheese - make sure it's nice and soft for easy blending!
Milk - I used 2% but you can definitely swap in skim milk or whole milk
Cool Whip - essential to keeping that light and fluffy texture to the filling, just be sure this is also softened to about room temperature for easy folding.
Red Food Coloring - for my Halloween dirt cups, I chose to turn the filling PINK! So omit this if you'd like.
Gummy Worms - obviously another selling point to the creepy, crawly dessert! Grab any gummy worms you like.
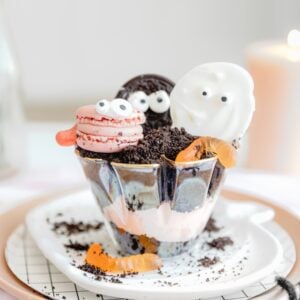
Toppings! White chocolate, eyeball sprinkles, black piping gel, mini macarons, Milano cookies. This is where it gets SO fun. I will explain below how I made each little monster, head stone, and ghost for this cute little halloween graveyard dessert cake.
Substitutions
I'll say it again - the combinations here are ENDLESS! But here are some fun substitutions to make if you'd like to try something different...
- Swap in any type of Oreos you'd like! I've made it with the vanilla Oreos and it was delicious.
- Try a different flavor of pudding. I chose vanilla because I wanted to turn it pink with food coloring but feel free to try chocolate, pistachio, banana...any kind you'd like!
- The toppings are totally optional and you can really get creative here. Just don't forget to always have the gummy worms for a true halloween dirt and worms cake!
How To Make Oreo Crumbs
This is truly the easiest part of the process but you will need a food processor, blender, or a really determined child to crush these all up...
- Place the whole sleeve of Oreos in the food processor or blender.
- Turn on high until it is pulverized into a "sandy" texture.
If you don't have a food processor or blender you could also do it with a ziplock bag and a rolling pin.
- Place a portion of the Oreo cookies in a gallon ziplock bag and begin firmly but gently rolling the pin over the bag.
- Keep going until they are crushed up and a fine, sand-like texture.
- Repeat until all Oreos are crushed up.
How To Make Oreo Dirt Cake
So you've got your crumbs all crushed up and now we need to whip up the filling!
Tools Needed
- Large mixing bowl - To easily whip together the pudding filling
- Food Processor or Blender - This will help streamline the process of making the Oreo crumbs.
- Hand mixer - You could also use a stand mixture but I find for this recipe, it's just as easy to use the smaller hand mixer.
- Spatula - Makes scraping down the bowls of pudding mixture easy!
Instructions
- In a large mixing bowl, with a hand mixer, beat the softened cream cheese until smooth.
- Sprinkle in the pudding packet and continue to beat the mixture until it is fully incorporated with no lumps.
- On a slower speed with your hand mixture, beat in the milk and food coloring until it is combined.
- Lastly for this mixture, fold in the cool whip with a spatula until it is pink all the way through the mixture.
- Place in the fridge for 10 minutes up to overnight.
- When you are ready to assemble, grab your oreo crumbs and the pudding filling and starting with the Oreos, layer each mixture in cups, a trifle dish, or even a baking pan.
- Don't forget to add a few gummy worms to the "dirt" portion of each layer.
- Repeat layering until all the mixtures are used up and end it with a sprinkling of dirt on top.
Decorating the Oreo Graveyard Cakes
Well, this was my favorite part, I'm not sure if you could tell..hah! I had way too much fun creating all different creatures and monsters to top these halloween graveyard dirt cakes.
White Chocolate Ghosts
- Grab some white melting chips and place in a microwave safe bowl.
- In 30 second increments, melt and stir the chocolate in between until fully melted and smooth.
- Taking a spoon, spoon a dollop of the melted chocolate on a piece of parchment paper and with the back of the spoon, make a swiping motion down to create a little "tail."
- Let these set for about 10 minutes to harden and decorate with eye ball sprinkles.
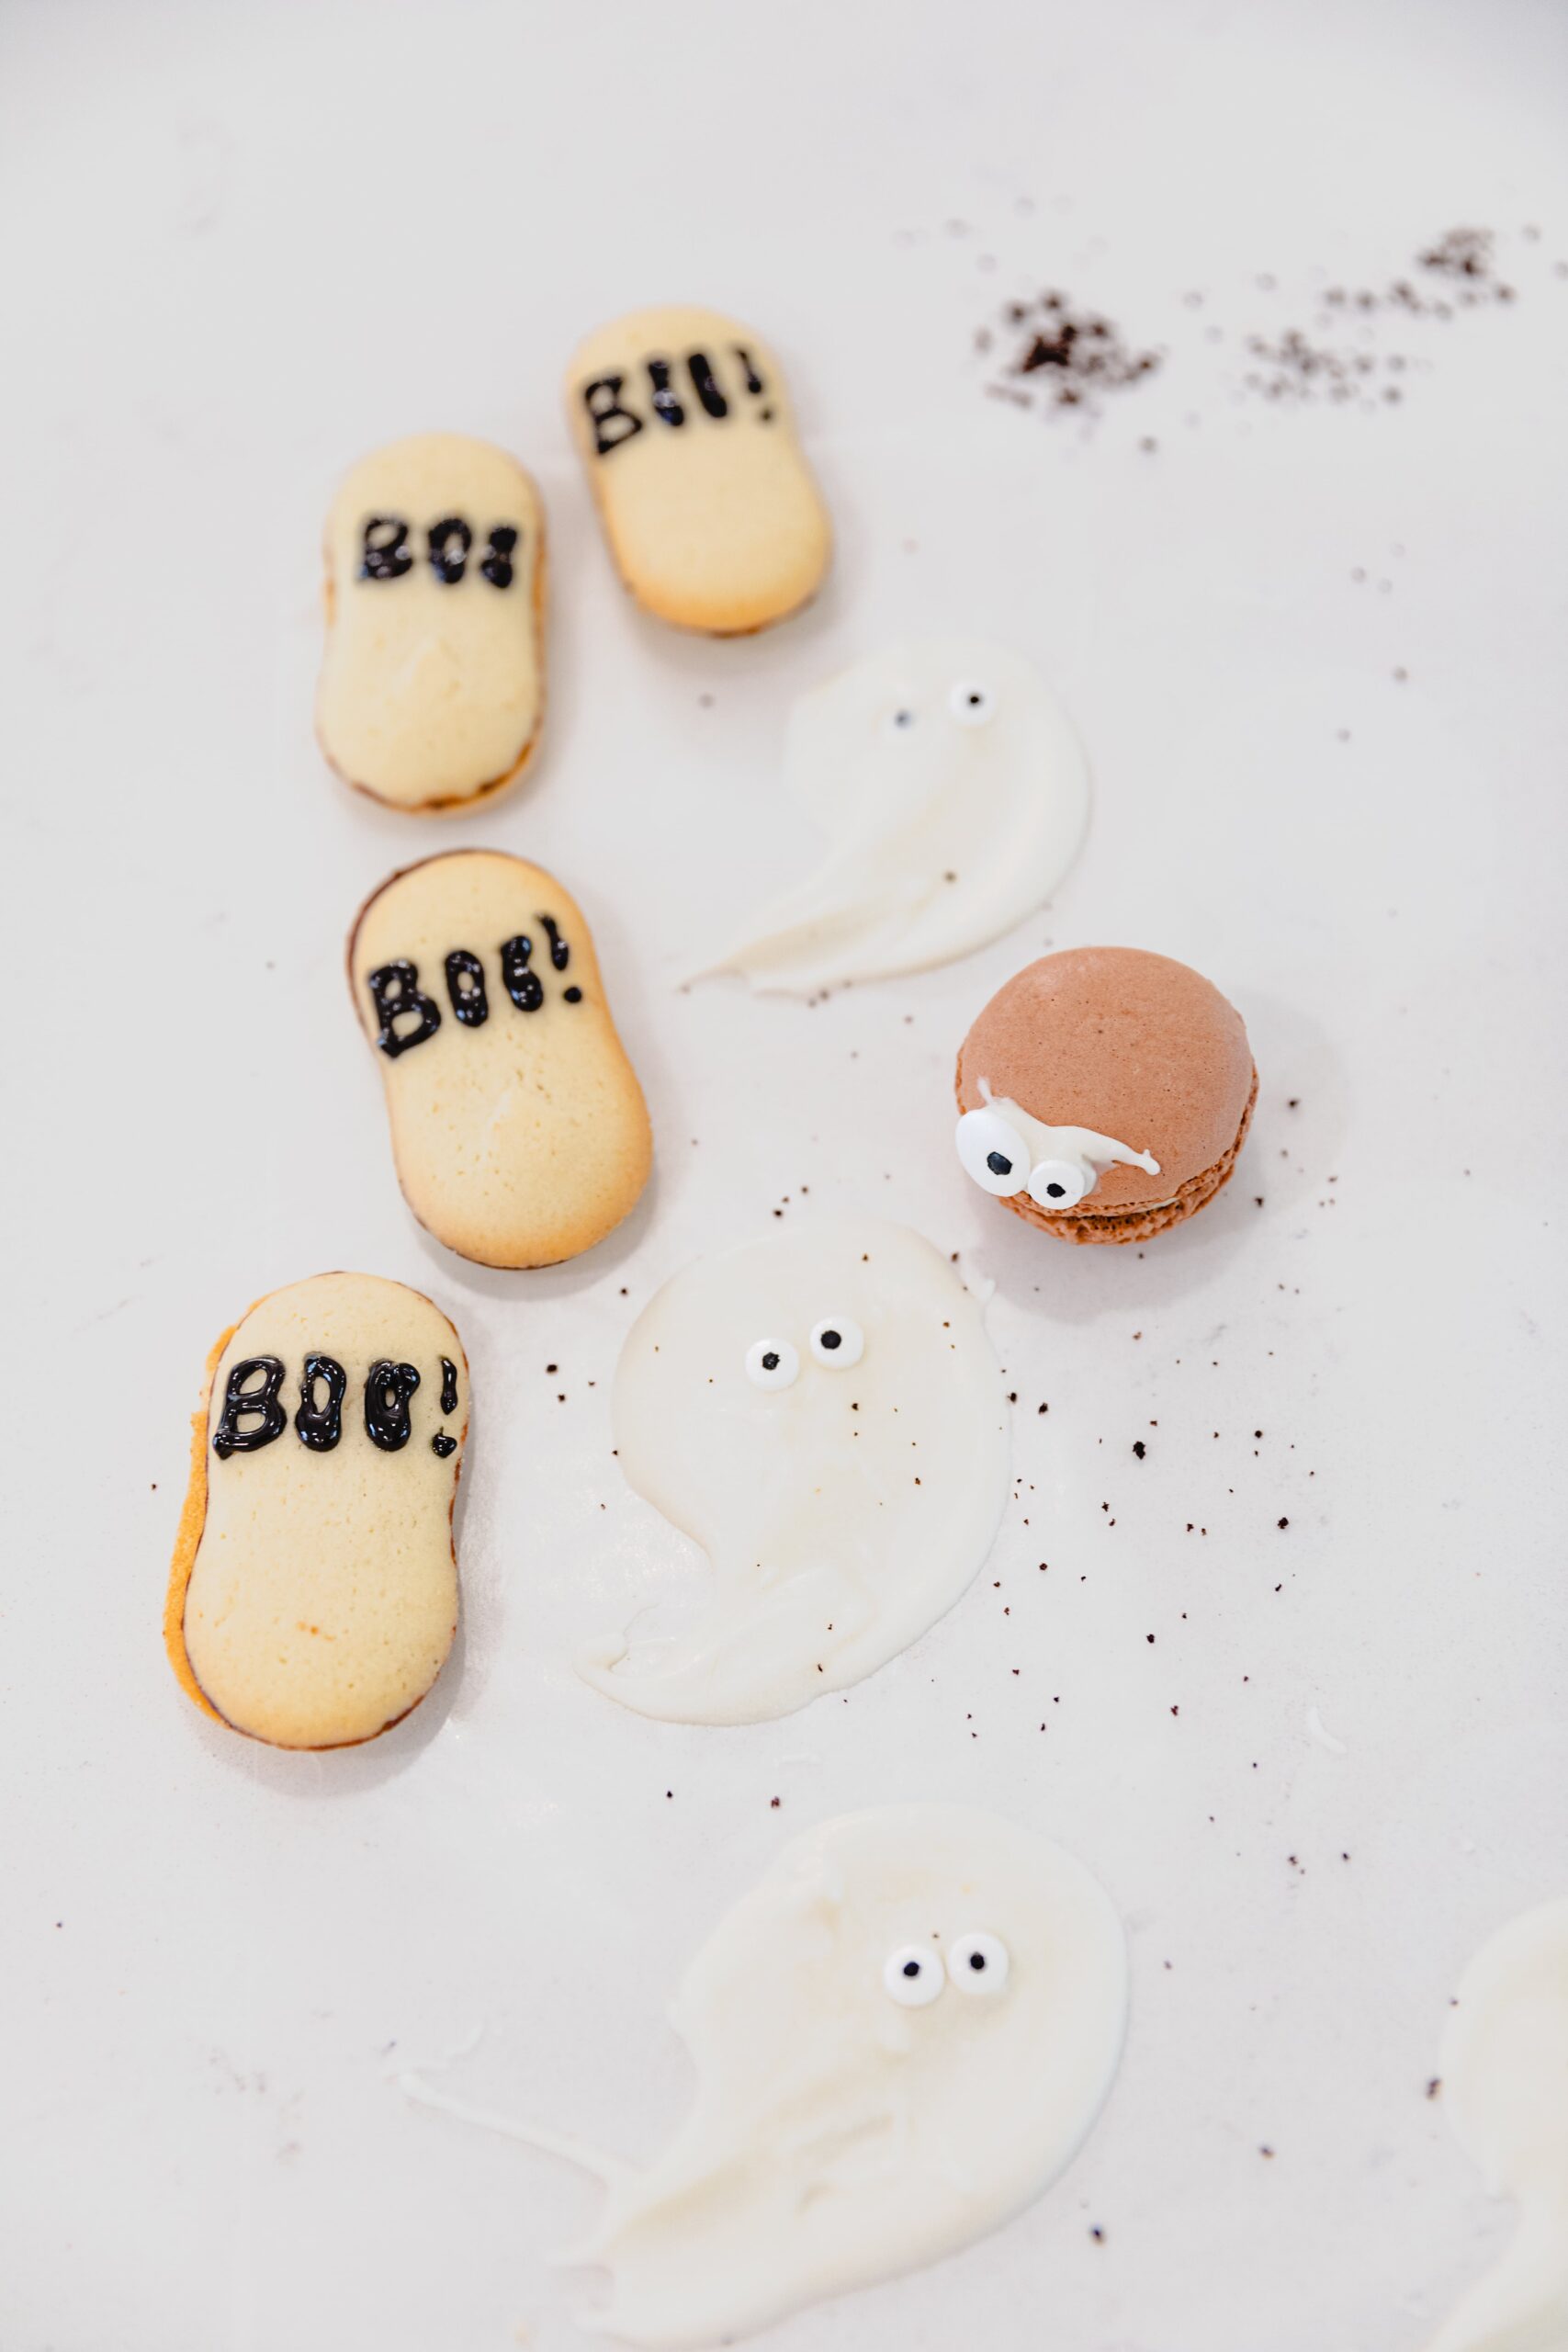
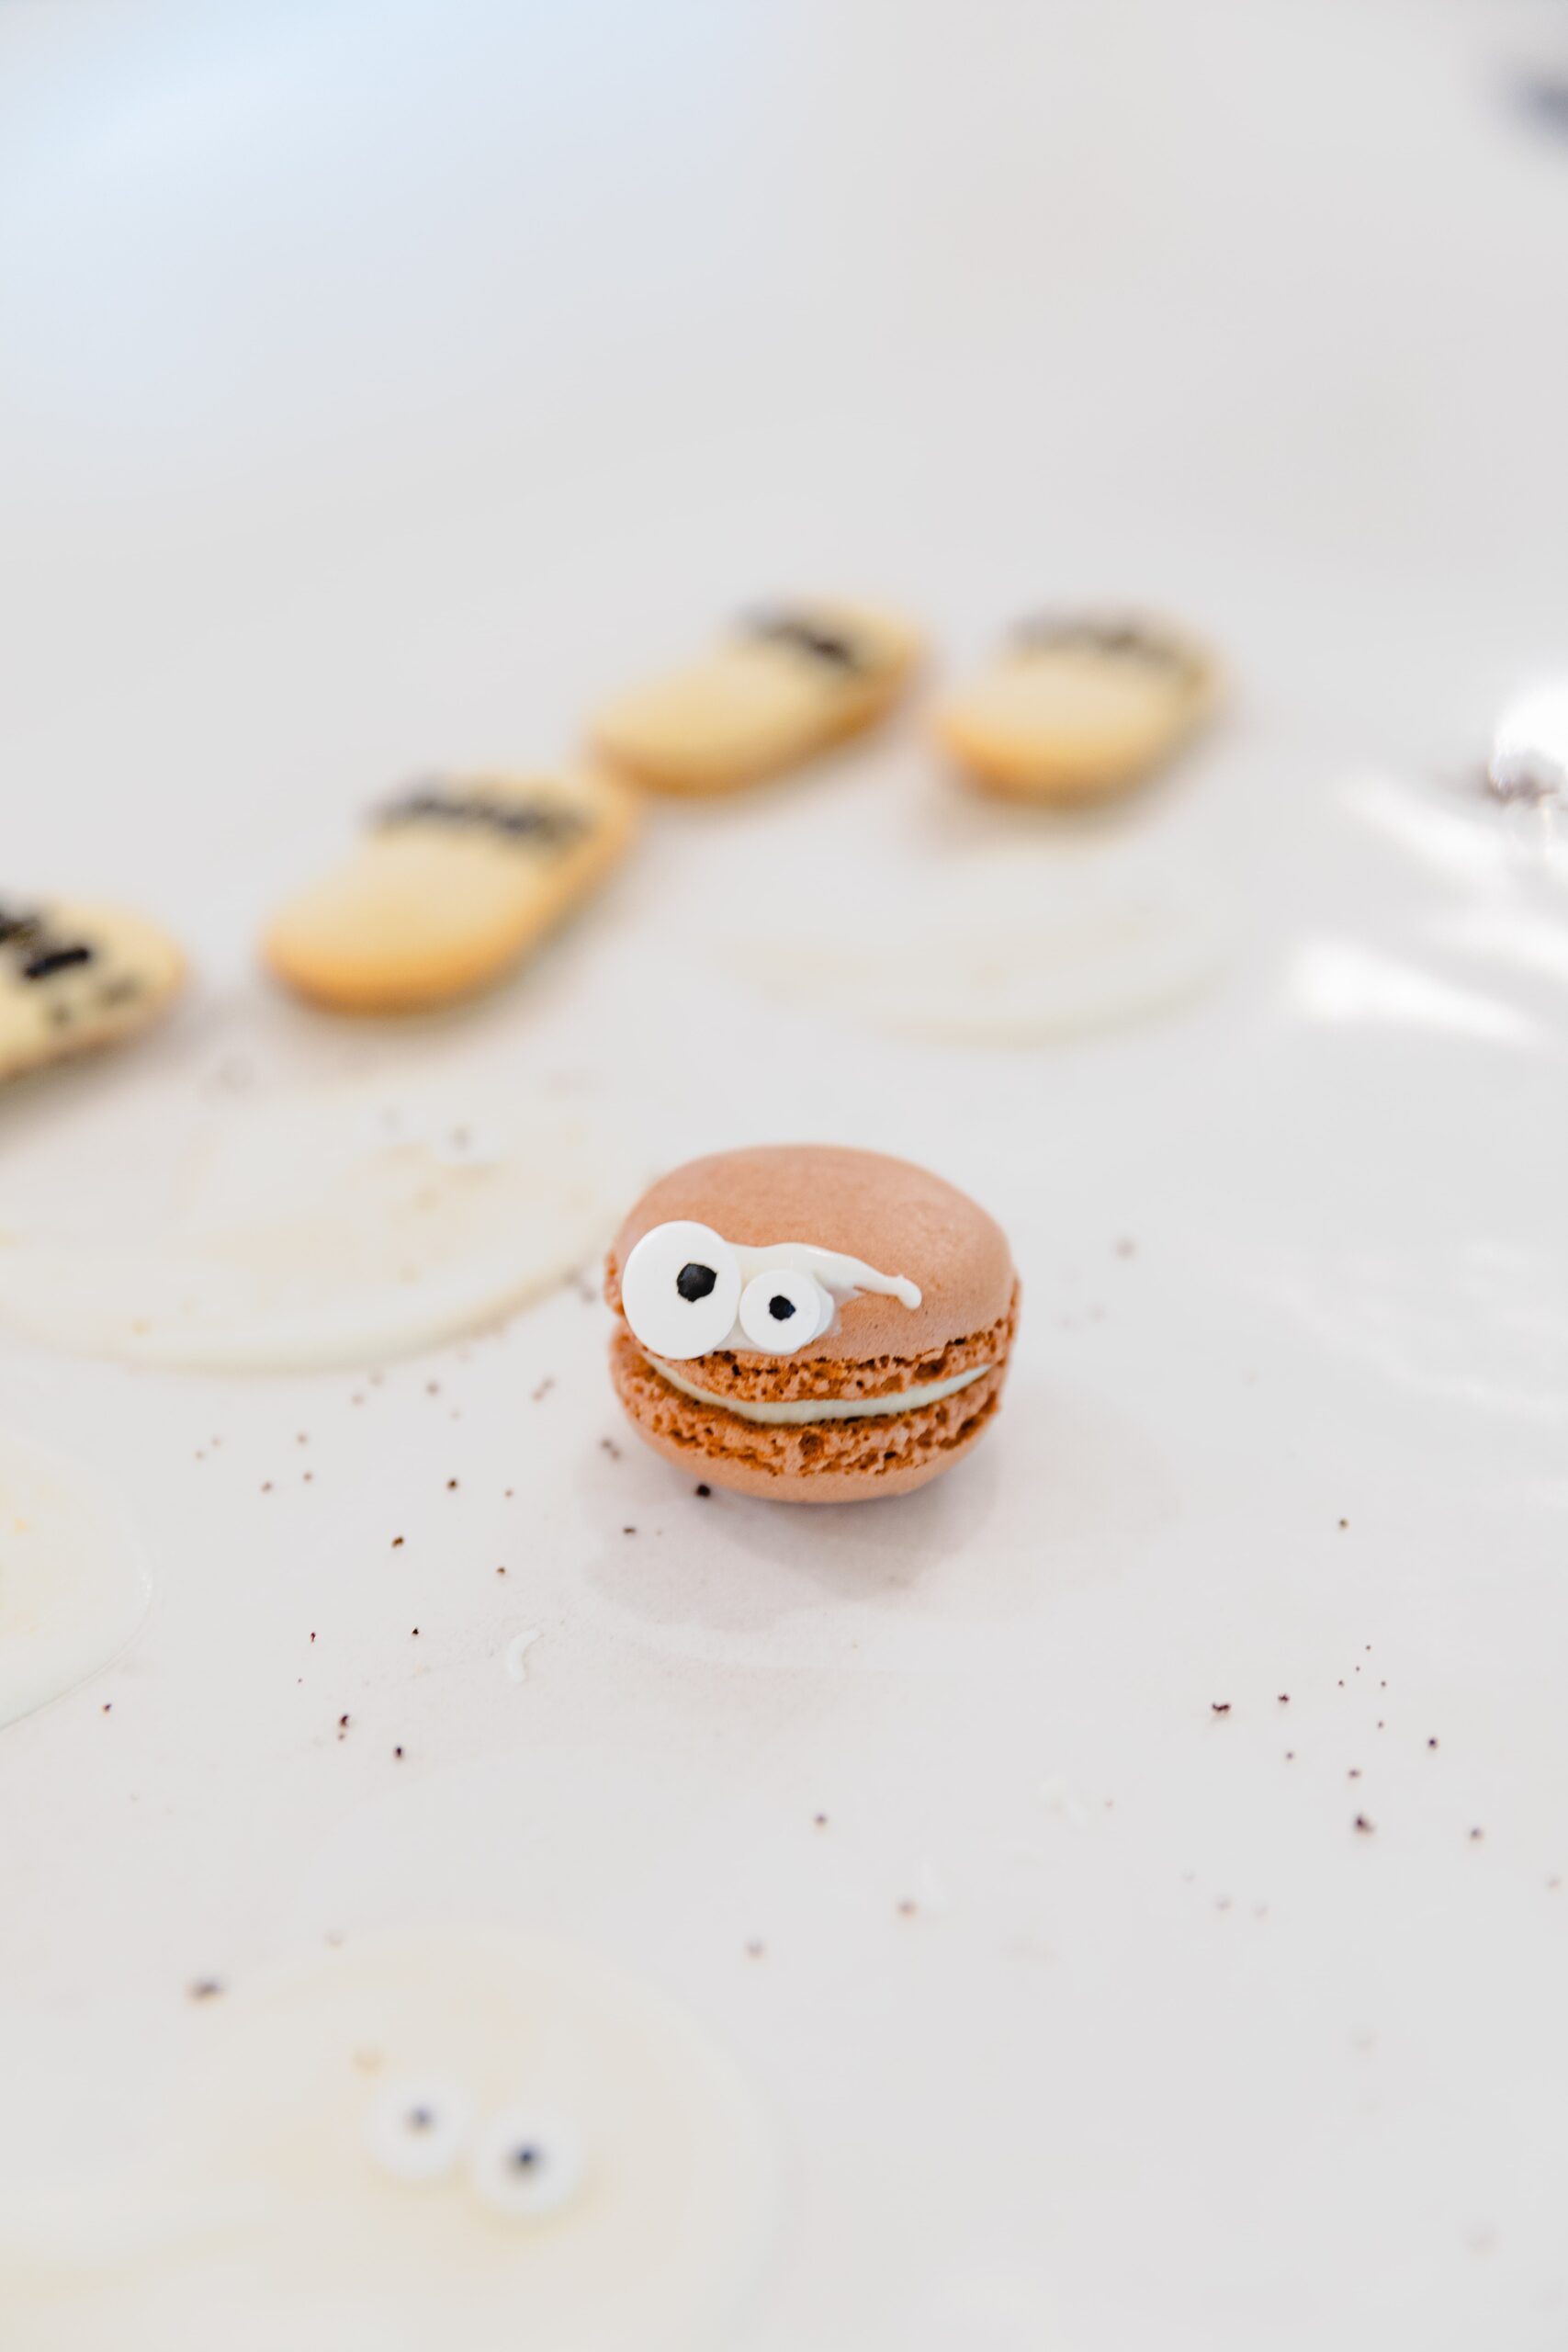
Mini Macaron Monsters
- Using frozen mini macarons, take a dot of black piping gel and make 2 dots on the top cookie.
- Stick on 2 eyeball sprinkles and let set for 10 minutes to harden. Add these to your dirt cups!
Milano Cookie Gravestones
- Grab a few Milano chocolate cookies and use the black piping gel to pipe words like "BOO" or "RIP" to add little gravestones to our spooky dirt cups!
You can see the possibilities are endless here and you could use anything you'd like to create a scary scene on these graveyard cakes.

Tips and FAQ
Don't forget to keep your cream cheese and the Cool Whip at room temperature before starting. This will really help make sure everything stays nice and smooth.
Be sure to refrigerate the pudding mixture for at least 10 minutes before layering and after layering the cakes, pop it back in the fridge for maximum freshness..
How to keep the dirt cake from getting watery? Don't add too much milk, this is supposed to be a thicker pudding filling and if it's too watery, it will definitely ruin the texture and make the oreo crumbs soggy.
How to make ahead of time? This can easily be prepped ahead of time, but keep the layers separate until about 30 minutes before serving. Just store the crumbs in an airtight container or ziplock on the counter and the pudding filling in a mixing bowl in the fridge.
Storage directions: While you can definitely store this after making and serving, I would only keep this in the fridge for about 24 hours after making for the best results. Just store them covered in the serving dish you used, tightly wrapped with plastic wrap.
More Halloween Treats
Did you love making these spooky cups? Try out some of my other halloween holiday ideas...
5 Spooky Kids Meals For Halloween
How To Host A Black Tie Halloween Party
📖 Recipe
Halloween Oreo Dirt Cake
Equipment
- 1 Food Processor or Blender
- 1 Large Mixing Bowl
- 1 spatula
- 6 8oz clear cups
Ingredients
- 3.4 oz packet vanilla pudding
- 8 oz cream cheese softened
- 9 oz cool whip softened
- 1 cup milk
- 3-5 drops of red food coloring
- 1 14 oz package of oreos
- 1 cup gummy worms
- 1 cup white chocolate melting chips
- Black piping gel
- Optional toppings: eye ball sprinkles white chocolate ghosts, mini macarons
Instructions
- In a large mixing bowl, use a hand mixer to beat the softened cream cheese at medium speed until smooth, about 1 minute.
- Sprinkle in the pudding packet and continue to beat this together for another 1 minute until combined.
- Beat in the milk and food coloring and continue to mix until this is totally combined and smooth.
- Fold in the softened cool whip and stir until the pudding mixture is pink all the way through.
- In a food processor add the package of oreos and turn on. Let this run until the oreos turn into a sand-like texture and very finely ground.
- Using cups, or a large trifle dish, begin by layering the oreo mixture followed by the pink filling, repeat this layering process until the 2 mixtures are completely used up and top with gummy worms.
- If you are interested in topping them with white chocolate ghosts, in a microwave safe bowl melt the white chocolate 30 seconds at a time until melted and smooth.
- On a piece of parchment, take a spoon full of the white chocolate, drop it on the parchment and with the back of the spoon, make a swiping down motion to create the ghost figure.
- Let these set for about 10 minutes then add one or two dots of piping gel and stick on sprinkle eyeballs.
- Top the dirt and worm cups (or trifle) with these decorations and enjoy!
zoritoler imol says
you have a great blog here! would you like to make some invite posts on my blog?